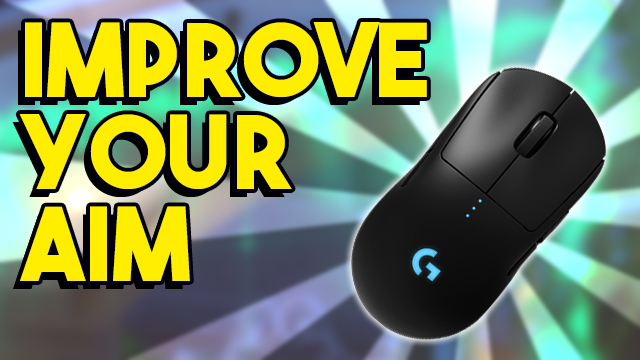
This “how to improve your mouse aim” guide is here to help you turn that awful aiming hand into a tool of PC gaming wonder. Whether you’re trying to master Fortnite, Overwatch, PUBG, or one of the many other PC shooters, there are a number of aim training tips that we can teach you. It might start out as a bit of a grind, especially if you’re used to aiming with a console controller (there’s a guide for that here!), but if you stick with it, you’ll come out on the other side as a stronger and better PC gamer.
Whatever hardware you use, and no matter the games you play, this guide will help you master the mouse. Read on for a breakdown of must-know tips and tricks on how to improve your mouse aim.
How to improve my mouse aim?
How to improve your aim with a mouse comes down to a few things:
- Using a comfortable sensitivity
- Ensuring that the sensitivity is correct for the situations you’ll face in-game
- Potentially using multiple DPI settings
- Remaining consistent across all titles you play
- Incorporating good strategies to help enhance that aim
Buy the Glorious Model 0 gaming mouse here
We’ll be taking an in-depth look at each of these bullet points, explaining what they mean and how they will help your mouse aim improve.
What is the best sensitivity for aiming with a mouse?
Aiming with a mouse is a little different to aiming with a controller. While a game pad’s analog stick has a limited range of movement, a mouse can be dragged to the very edge of a table or mousepad. This means that lower sensitivities become more viable, as quick 180 spins can still be performed with a wide arm swipe.
Lower sensitivities are generally accepted as better due to how they offer more control when making slighter adjustments. It’s harder to overshoot a headshot with a lower mouse sensitivity, and it’s easier to target enemies at longer ranges. Combine this with the fact that larger mousepads and desks allow for a full arm’s length swoop, and you can see how players can make low sensitivities work best for them.
Buy the Logitech G Pro Wireless gaming mouse here
With that said, higher sensitivities aren’t all bad. If you have limited room to move your mouse, then by all means increase your sensitivity. (Pro-tip: Changing to a tenkeyless or smaller keyboard can help squeeze out a bit more room for your mouse.)
The need for quick and unpredictable movement in games like Fortnite has also led to PC gamers cranking up their sensitivities. Rapidly moving to build in one direction, while whipping out a weapon and firing in the other, demands some quick hand movements.
Is it okay to use a high sensitivity?
If you don’t have as much room on your desk, a higher sensitivity may be necessary. I’d recommend starting with a full arm swing equalling a 360-degree spin. Or, to more easily measure sensitivity across multiple games and multiple gaming setups, use the side of a piece of paper. For example, tweak your sensitivity to have the long side of an A4 sheet of paper matching up to a 360-degree spin. Using paper allows an easy method of bringing your sensitivity across from game to game, with no software tricks required. This is especially helpful when you’re at an event or a friend’s house.
It can be frustrating to try new sensitivities, as they can initially not feel “right.” This is especially true of lower sensitivities, where it feels like you’re way off in your arm movements. You’re going to want to stick with it. I’d recommend avoiding competitive shooters during the first stages, instead opting for a fun single-player shooter instead. Doom is my personal go-to when it comes to trying out new settings and mice. Focus on moving quickly and being accurate. Easier difficulties should help reduce the stress you feel. Crush those demons and get your aim on point!
Best DPI settings for a gaming mouse
Before tweaking anything to do with mouse DPI and in-game sensitivity settings, first head into your Windows “Additional Mouse Options” settings and change the following:
- Pointer Options > Select a point speed: 6.
- This is the exact middle between Slow and Fast.
- Pointer Options > Enhance pointer precision
- Ensure this box is unchecked.
You’ll then want to go into your mouse software and set the polling rate (the rate at which the mouse checks for movement) to the highest available setting. This is usually 1,000. Now we can adjust DPI.
Over the past decade, the sensors used in newer computer mice have evolved to allow for extremely high DPI settings. The Logitech G502 Proteus Core mouse I personally use, for example, has a maximum DPI setting of 12,000. Despite this, I’ve selected 1,600 DPI as my go-to setting for work and play. 400 and 800 DPI are also common options, though you may need to switch back and forth when handling desktop tasks on multiple high-resolution displays.
I’d recommend 400-1,600 as a good starting point, as that will combine nicely with available in-game settings.
Setting multiple DPI settings
Many mice allow for multiple DPI settings to be assigned to a toggle button. This means that you could have 400, 800, 1200, 1600, and 2000 all available to cycle through. This can be useful when dealing with different weapons, for example a sniper equipped with a high-powered scope and a shotgun for close-range encounters, when different sensitivities are desired and the game’s own sensitivity options don’t allow you to tweak it.
A “Sniper button” is also quite common on modern mice. Holding this button in allows for a temporary DPI reduction that is supposed to help with zoomed-in shots.
While I’m sure there are gamers out there who swear by these features, I think sticking with a single DPI setting is best for those looking to perfect their aim. Work on consistency across all games with a single DPI setting, before you start pushing things further.
Consistency
The most important thing you want to do when starting a new PC game for the first time, is to ensure that your sensitivity remains consistent. Of course, not all games measure in-game sensitivity the same way, so you’ll need to use tools like Mouse Sensitivity or the piece of paper that I mentioned earlier.
Once you’ve locked in your sensitivity, it’s time to build that muscle memory with repetition. If you don’t want to ruin your stats by heading into competitive PvP, try to utilize a game’s single-player offering, or set up a multiplayer match with bots. Practice flicking from enemy to enemy and try to focus on headshots to truly test your skills.
Aiming smart
Aiming accurately is only part of the battle when it comes to performing your absolute best as a PC gamer. To give yourself the best possible chance of winning a gunfight, you’ll need to think about where your enemy is going to be and prepare for that engagement.
Pre-aiming
This is where you use your map knowledge to estimate where opponents are going to pop up from and aim there ahead of time. This will allow you to get the drop on anyone unlucky enough to peek out from a corner. Become a master of pre-aiming and you’ll get some easy frags with little resistance.
Pre-firing
The next step up from pre-aiming is pre-firing. This is where you know an enemy is behind a corner and so you begin laying down fire as you push forward. This shock-and-awe tactic not only scares the enemy, but also helps ensure that you land the first shot. It’s especially helpful when you have already damaged an enemy and want to finish them off. It’s a risky move to try and pull off, so make sure you’re sure before moving in.
GameRevolution is a participant in the Amazon Services LLC Associates Program, an affiliate advertising program designed to provide a means for sites to earn advertising fees by advertising and linking to Amazon.com.