Voyage of Despair is the first map of the new Zombies campaign in Black Ops 4. As expected, it’s a complicated map, with plenty of easter eggs hiding within. While the primary objective is just to live as long as you can, you’ll want to figure out the secrets of Voyage of Despair to get the tools you need to survive. Below, we’ll show you how to find the Sentinel Artifact and where to find each Pack-a-Punch machine location in the Black Ops 4 Zombies Voyage of Despair map.
Where to Find the Sentinel Artifact Location in Black Ops 4 Zombies Voyage of Despair
Before you can do much of anything on the map, you need to find the Sentinel Artifact. From where you spawn, the artifact is clear on the other side of the ship on the Poop Deck. There are several paths you can take to get to the object, but all of them take roughly the same amount of points and time.
We haven’t quite figured out the optimal path to the Poop Deck (if there is one), so we suggest just pushing forward as quickly as you can. You’re best off just grabbing a decent second weapon, such as the Saug 9mm located just inside the door you can unlock for 500 coins on the lower level. Most of the easter eggs and secrets require you to activate the artifact and open the red seal doors so you can access the entire ship, so this should be your first goal.
Pack-a-Punch Machine Locations in Voyage of Despair
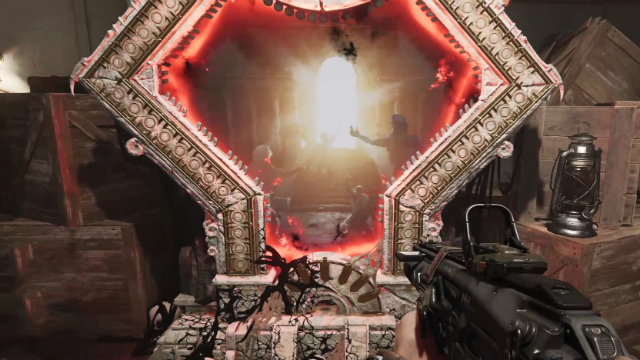
Once you activate the Sentinel Artifact, you’ll see four red orbs fly out to different parts of the ship. These orbs power the Pack-a-Punch machines and allow you to activate them. There are for Pack-a-Punch machines located in the Voyage of Despair map in Black Ops 4 Zombies, and you’ll need to activate each of them to unlock the ability to power up your weapons.
You can activate the machines in any order. However, the guide below is likely the fastest route you can take to get all four.
First Pack-a-Punch Machine Location
The first Pack-a-Punch machine is easy to find. It’s directly in front of where you activated the Sentinel Artifact. You’ll be able to see it easily because of the glowing red orb hovering over it.
Second Pack-a-Punch Machine Location
The next machine is in the Turbine Room. To get there, you’ll need to go through 3rd Class Stowage, which is located through a pair of doors that can be found immediately down the stairs from the Poop Deck. Once you get through 3rd Class, you’ll hit Provisions which connects to the Engine Room. From the Engine Room, you’ll need to descend into the water and swim in the opposite direction from the power-up statue. You’ll see a small door and through it is the second Pack-a-Punch machine. Note, you don’t have to drain the water to activate this machine.
Third Pack-a-Punch Machine Location
For the third machine, head back towards the front of the ship where you spawned. You need to reach the Grand Staircase and go down the stairs to the lowest level. When you reach the bottom, you’ll see the third Pack-a-Punch machine directly ahead of you.
Fourth Pack-a-Punch Machine Location
For the final Pack-a-Punch, you’ll need to head to the area where you spawned at the start of the map. There are some doors set into the wall near the Forecastle that were initially locked with red seals. Now they’re open and will lead you down to the mail room. Go through the mail room and into the flooded cargo room. Once in the water, swim in the opposite direction of the way you were pointed when you came down the stairs. Nestled against the back wall of the cargo room you’ll find the last Pack-a-Punch machine.
What Do Pack-a-Punch Machines Do?
When you activate the last Pack-a-Punch, it will spawn a portal. For 5,000 points you can throw any weapon into the portal, and it will be enhanced. Usually, this means it’ll get a larger magazine and more damage, but the effects change from weapon-to-weapon. For an additional 2,500 points you can re-pack an already upgraded weapon, and in exchange, your gun will be upgraded to do extra elemental damage.