[Editor’s Note: This tier list was updated in February 2017 to add 10 new operators, including the two new arrivals Jackal and Mira. Note that this list is for casual play, and doesn’t represent high level pro play.]
As a tactical shooter enthusiast, I’ve found myself completely engrossed in the latest Rainbow Six game. Tom Clancy’s Rainbow Six Siege is all about teamwork, and getting the most out of the Operators whether you’re an Attacker or Defender.
With many Operators to choose from, many players have found themselves struggling to choose which ones to unlock first. Due to some major discrepancies between the effectiveness of each Operator, the choice isn’t as difficult as the 20 options may lead you to believe.
Below you will find a tier list for all Operators.
S-Tier
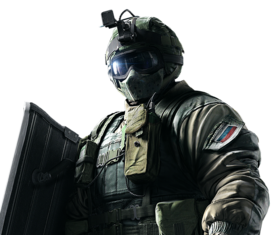 Fuze (Attacker)
Gadget: Cluster Charge
Difficulty: Hard
Fuze makes Defenders think twice about where they are positioned. His Cluster Charge fires five small grenades into a room through any breaching point, causing unpredictable explosions in a defensive perimeter. These commonly kill unsuspecting players before they know what’s happening, resulting in Fuze being a feared Operator among many veterans. Using him effectiveness requires a player to gather intelligence using drones and communication with teammates. Cluster Charges shouldn’t just be fired on a whim, and the position of the hostage on hostage rescue maps must be taken into account to avoid collateral damage.
Also Read: Is Rainbow Six: Siege The Best Tactical Game Of This Gen?
Mute (Defender)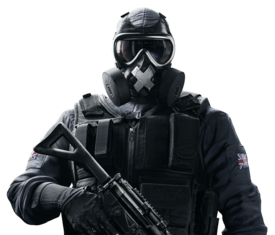
Gadget: Signal Disruptor
Difficulty: Medium
Intelligence is a huge aspect of gaining an advantage in Rainbow Six Siege, and Mute is able to completely shut down the Attacker’s Scouting Phase when he places his Signal Disruptors in good spots. By placing these at major entrance points, drones are incapable of entering a defensive perimeter to locate enemies and objectives, resulting in Attackers making breaches without knowing what’s on the other side.
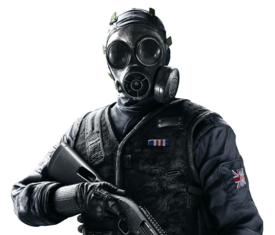 Thatcher (Attacker)
Gadget: EMP Grenade
Difficulty: Easy
Capable of taking down all electronics in one fell swoop, Thatcher’s EMP Grenades are remarkably effective in just about any situation. All it takes is one of these grenades thrown just about anywhere in a room to remove threats including electrical barbed wire, and even potent defensive gadgets such as Jager’s Active Defense. He counters several Defenders, making him a must-have in most operations.
 Thermite (Attacker)
Gadget: Exothermic Charges
Difficulty: Medium
Making an entrance out of virtually any wall is Thermite’s forte. He makes enemies uncomfortable as walls oncen thought to be secured fall apart within mere seconds due to his Exothermic Charges. He also has a medium rating in armor and speed, in addition to two solid weapon choices in the 556xi and M1014, making him a very balanced Operator when he isn’t busy breaching.
A-Tier
 Blackbeard (Attacker)
Gadget: Rifle Shield
Difficulty: Medium
Added in the Dust Line update, Blackbeard is a resilient operator. Using the Rifle Shield, he is capable of surviving multiple headshots provided he is aiming down sights. This gadget makes him a powerful frontline unit for breaching a room, serving a role similar to Montagne but with greater priority of offense. He additionally comes equipped with fairly effective assault and marksman rifle loadout options that are only inhibited by their low magazine size. His sole weakness is being exposed when alone, and lesser effectiveness in large, open rooms. Though, when provided with support, he is capable of being an imposing force that Defenders hate dealing with.
Blitz (Attacker)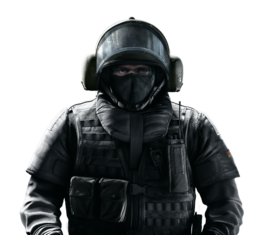
Gadget: Flash Shield
Difficulty: Medium
At one point or another, the Attackers have to make entry into a defensive perimeter. Bullets are sure to fly like hail, and nothing is better to lead the charge in that circumstance than a shield. Blitz’s shield is the best of the bunch, as it’s capable of producing a blinding flash that disorients players within range. This flash typically comes as better utility than Montagne’s Extendable Shield, making Blitz the ultimate entry-man. However, he requires support as his LFP586 and P9 sidearms lack damage throughput, and he’s vulnerable to Nitro Charges.
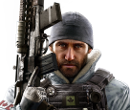 Buck (Attacker)
Gadget: Skeleton Key
Difficulty: Medium
If you’re okay with putting yourself on the line, Buck is an outstanding operator. He specializes in breach and chaos, delivered by an under-barrel shotgun called the Skeleton Key. This gadget can be quickly accessed providing options for killing Defenders in addition to punching holes in the wall. In this way, he serves a role very similar to Sledge, although he’s considered easier to master due to being less vulnerable when breaching. Perhaps his greatest strength is that he can’t be hard-countered, making him a safe pick for newer players.

Capitao (Attacker)
Gadget: Tactical Crossbow
Difficulty: Hard
Capitao is a high skill cap operator to play who employs a Tactical Crossbow to pressure enemies. His arrows are situational, but are one of the best ways to scatter Defenders who are hunkered down. His strengths are particularly effective in cases where you’ve locked down a group of enemies into a small area, and can deploy Asphyxiating Bolts to create chaos within the defensive perimeter. He isn’t solely reliant on the crossbow, thankfully. His assault rifle and light machine gun outmatch a lot of opposing weaponry. The light machine gun in particular pairs well with Micro Smoke Grenades if you decrease visibility at a choke point and lay down suppression fire.
Castle (Defender)
Gadget: Armored Panels
Difficulty: Medium
Castle’s Armored Panels require breach to take down, shutting down door pokes by Attackers. They are useful in every defensive perimeter, making him a reliable pick. He does require some skill to use due to his sub-par primary weapon choices, though.
 Hibana (Attacker)
Gadget: X-KAIROS
Difficulty: Hard
Hibana carries incredible firepower. Her X-KAIROS 40mm launcher causes critical area of effect damage that provides a similar solution as Thermite. Though, unlike Thermite she requires some setup as the 40mm rounds require space to travel and won’t break through an unweakened wall. In addition, they are countered by Shock Wire and Mute’s Signal Disruptors. However, their damage potential is among the highest in the game and can turn the tide of battle in an instant, made better by her potent primary weaponry. Hibana is considered a fun albeit difficult to utilize operator that is worth putting time into.
 Jackal (Attacker)
Gadget: Eyenox
Difficulty: Hard
Evaluating Jackal’s position in the current meta-is tough considering how situational he is. That said, his ability to locate players makes him a roaming camera. The Eyenox isn’t easy to use effectively, when the player knows what he or she is doing, it can teeter the odds greatly in the favor of the Attackers due to the value of information in the meta-game. Defenders being notified of being spotted helps to balance the character, but in general while playing in pick up games he is extremely strong. His available loadout is also effective, particularly the C7E which many consider to be the best assault rifle in the game. With all this in mind, this newly added operator is an attractive new option.
Jager (Defender)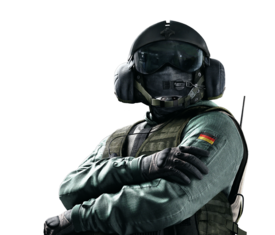
Gadget: Active Defense
Difficulty: Medium
Jager can single handedly prevent grenades, including Fuze’s Cluster Grenades, from entering a defensive perimeter, which is arguably the game’s strongest gadget. The Active Defense can be shot down, so careful placement is a must (preferably on reinforced walls). Jager’s only weakness is his low armor, which makes him rely on successful Active Defense deployment to be a strong contributor to a team.
Rook (Defender)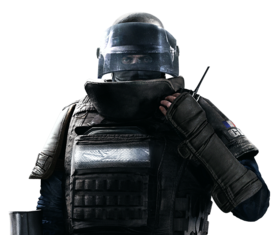
Gadget: Armor Pack
Difficulty: Low
Rook’s Armor Pack is extremely reliable, useful in every match where teammates don’t run off ignoring it. The additional armor allows teammates to take roughly one more bullet before falling, and also increases their chance of down but not out. Made better, Rook comes equipped with high armor and solid close-range weapon choices. He’s one of the most reliable picks in the game.
Sledge (Attacker)
Gadget: Breaching Hammer
Difficulty: Hard
Sledge is capable of taking over breaching duty by himself, allowing his teammates to bring tactical equipment like Stun Grenades and Flashbangs instead. He opens his own avenues to the objective location without fear of running out of charges, making him a dependable Attacker. Equipped with medium armor and a melee-range breach, he is vulnerable during breaches and should be used as stealthily as possible and preferably with another team member distracting at a different location.
 Valkyrie (Defender)
Gadget: Black Eye
Difficulty: Medium
Capable of placing up to three additional cameras around the map, Valkyrie is a master of intelligence. Made better, her Black Eye Cameras have full 360 vision, providing full visibility of rooms when placed properly. The strength of this capability is how it can be used to mobilize your team against the Attackers, which requires careful consideration and communication. Because of this, she is considered a must-have in high level play, but often times forgettable in pick up games. Note that these cameras can be hard countered by Thatcher. Her toolkit is potent, including access to a decent SMG and shotgun, both of which provide good firepower in close range situations.
B-Tier
Ash (Attacker)
Gadget: Breaching Round
Difficulty: Medium
Ash is a strong counter to Castle’s Armored Panels, and a good choice for breaching large, open walls. Ash’s difficulty comes from her low armor, which makes her an easy kill given her average primary weapon choices.
Bandit (Defender)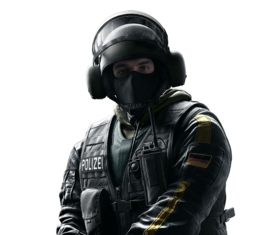
Gadget: Shock Wire
Difficulty: Hard
The Shock Wire is capable of making a variety of items damage Attackers who come near them, including barbed wire, reinforced walls, and shields. When deployed in good spots, such as at walls that are likely to be breached, or at barbed wire where several drones will try to penetrate through, Bandit outright halts an enemy’s advance and lowers the health of players prior to a firefight. Unfortunately, Bandit’s low armor and the luck involved with placing Shock Wire in effective spots makes him a second-rate Operator that’s probably better replaced by Mute.
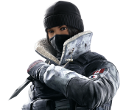 Frost (Defender)
Gadget: Welcome Mat
Difficulty: Easy
Don’t let Frost’s gadget name fool you. The Welcome Mat is one of the greatest newbie killers, serving as an often overlooked trap that punishes unsuspecting operators. Even against experienced players it can deny entry at a vulnerable location, or at the very least leave any players exposed who go near it and are forced to shoot and break it. Her weaponry is particularly potent, allowing her to secure kills at close distance.
Glaz (Attacker)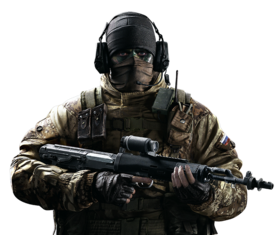
Gadget: Flip Sight
Difficulty: Very Hard
Glaz is by far the most difficult Operator to use effectively. His sniper rifle is soft countered by Rainbow Six Siege’s indoor, fortified areas. In order to make him useful in this environment, his weapon has been given the game’s only high penetration, which allows him to shoot through reinforced walls, and even the Presidential Plane’s windows. Due to this, he requires constant communication from teammates to provide him with enemy locations and marks when possible. When in the right situation and in the hands of a professional, he is responsible for making Defenders feel vulnerable, and taking them out without them knowing where they were hit from.
Kapkan (Defender)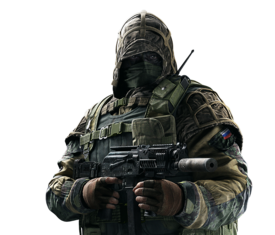
Gadget: Entry Denial Device
Difficulty: Easy
Out of all the Defenders, Kapkan requires the most luck to be successful. The booby traps he lays down are obvious by anyone with good observation skills, and are taken down with a simple explosion or one bullet. Against lower skill players, he can net an easy kill or two in a round where they rush through an entrance without checking for a trap. However, against higher skill players his usefulness comes from his good weapon choices, high armor, and the intelligence gained from hearing the location of the sound of enemies popping traps before entering.
 Mira (Defender)
Gadget: Black Mirror
Difficulty: Medium
Mira is a very interesting operator. Her Black mirror provides a distinct solution for gaining information on moving attackers. It can be countered in some situations, and sometimes will see no use if placed in sub optimal locations, but in general it serves great value for the team. Her loadout is roughly average, with the ITA12L standing out as the better of the two available options with its surprising properties at range. With a deployable shield and Nitro cell available, she can lockdown her room very well when paired with certain other operators.
Montagne (Attacker)
Gadget: Extendable Shield
Difficulty: Medium
Montagne has the biggest shield in the game, allowing him to stand up and enter a defensive position. This provides teammates with the largest mobile cover in the game. His low offensive capabilities mean that he will require support, especially if there are Nitro Charges present. Ultimately, Blitz is a better choice against competent players as his Flash can disorient opponents upon entry causing a defense to break down, something Montagne’s slightly larger shield coverage doesn’t provide.
Pulse (Defender)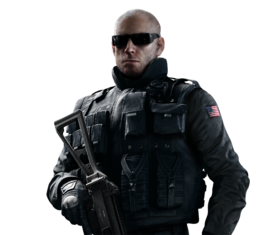
Gadget: Cardiac Sensor
Difficulty: Hard
Pulse is extremely situational. There aren’t many circumstances where pressure from the opposing team is from a location where Pulse can sit near a wall and listen with his Cardiac Sensor. However, there are opportunities where he can mark players about to breach, making an attack much easier to handle. His sub-par primary weapon choices coupled with his situational usefulness ensure that he isn’t a reliable pick.
Smoke (Defender)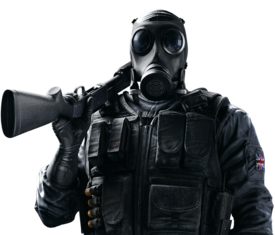
Gadget: Remote Gas Grenade
Difficulty: Medium
Smoke’s Remote Gas Grenades are usually circumvented by highly observative players, but render a small area of the map impassible for a few seconds potentially pushing back approaching Attackers. He’s particularly adept at halting Blitz and Montagne who move slower and have low visibility. His effectiveness ultimately comes down to Remote Gas Grenade placement and a little luck.
C-Tier
 Caveira (Defender)
Gadget: Silent Step, Interrogation
Difficulty: Very Hard
For players who enjoy stealth, Caveira is an interesting option on defense. She is capable of sneaking up behind Attackers and immobilize them before revealing the position of the opposing team. With low Armor and a very weak offensive toolkit, this becomes an incredibly important part of her play, one which is countered by the Attackers sticking together. The timing and coordination required make her a risky choice that is usually only utilized in pick up games where many consider her very fun to play but largely ineffective when compared to other options.
Doc (Defender)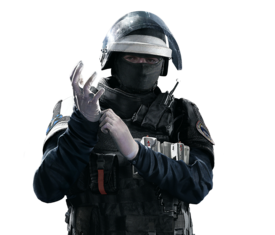
Gadget: Stim Pistol
Difficulty: Medium
Doc’s Stim Pistol relies on teammates falling to down but not out status, and him being in visibility to revive them, as well as enemies not being ready to take down the target a second time. As you might suspect, it’s uncommon that all these variables line up in Doc’s favor. His self-revive can be a game-changer, but once again is luck based, As a result, Doc becomes a high armored defensive character with a gadget that is seldom useful. If you are going to play as him or with him, be sure that you have a Rook on the team. The Armor Pack increase down but not out probability making Doc’s Sti Pistol more effective.
 Echo (Defender)
Gadget: YOKAI
Difficulty: Very Hard
Echo is arguably the most difficult operator to use effectively. His YOKAI drone require impeccable coordination with your team to utilize to its full potential. Without timing and communication, the drone becomes more of a liability than beneficial to the team. In addition, his weaponry is below par, placing further emphasis on his YOKAI. This is an operator that only advanced players usually have success with, and even then he’s circumstantial.
IQ (Attacker)
Gadget: Electronics Detector
Difficulty: Medium
IQ is a very popular pick, which is a detriment to most teams. She is far less effective than Thatcher at countering electronics, requiring time to pull out her gadget to inspect for their location when they’re already noisy and easily taken down by an EMP Grenade anyway. Made worse, she comes equipped with low amor. There are very few situations where she isn’t a liability, and could be argued as Rainbow Six Siege’s worst Operator.
Tachanka (Defender)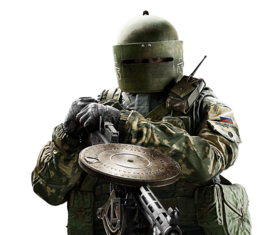
Gadget: Mounted LMG
Difficulty: Hard
A turret LMG might sound like the perfect addition to a defensive roster, but provided Rainbow Six Siege’s destructible environments the turret becomes a liability. The surplus of choices for tactical equipment to stun or kill a sitting target coupled with the Mounted LMG’s lack of mobility makes Tachanka a sitting duck against any competent players. Getting the most out of him requires a team that’s willing to set up a strong fortification around him. Even then, the game’s netcode gives peeker’s a huge advantage, making Tachanka an easy kill for high reflex opponents.
Twitch (Attacker)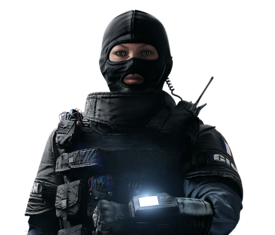
Gadget: Shock Drone
Difficulty: Medium
Twitch’s Shock Drone can disable traps and tick off enemies with light damage, but neither of these uses is particularly useful. In most situations, drones are better served for scouting than for disable. With low armor, Twitch becomes an ineffective Operator.


