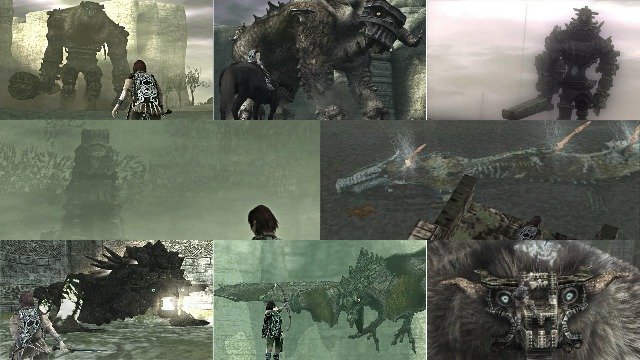
The Shadow of the Colossus PS4 remake has come, and that means we get to dust off one of our old walkthroughs and put it to good use. This Shadow of the Colossus walkthrough was first posted way back in 2005 and was written by Alex Eagleson. Although this guide was originally written for the PS2 version of the game, as our review notes, the remake is faithful enough that all the tips, strategies, and locations of the colossi are still applicable.
We’ve kept this Shadow of the Colossus guide as faithful to the original text as possible. All that has been changed is the formatting to make it more mobile and search friendly, and some text has been added to make some sections more clear.
Spoiler-Free Tips
If you just need a quick spoiler-free hint to help defeat the colossi, you can find a tip for each one below.
- Use the light of the sword to determine where the weak point is.
- It’s got something to do with his feet.
- The bracelet he wears prevents you from climbing, eleiminate it.
- The solution involves those four doors elsewhere on the field.
- You need to get his attention somehow from a distance.
- If only you could manage to hide yourself…
- The trick is to get a hold on his tail.
- Perhaps if it were higher off the ground…
- You won’t get anywhere fighting him in the cave.
- It’ll come to you while running around on the horse.
- The boss has a deadly fear of fire.
- You need to get to higher ground for this one.
- He’s a flying creature, sounds like a job for the bow.
- Lay waste to the stone ruins.
- There’s definitely some way to get up the wall on the side.
- When it doubt, look for another hidden weak point.
Further Tips
If the hints above didn’t do it for you, here’s a further tip for each colossi that’s a bit more revealing.
- Stab the symbol on the back of his left leg.
- When the boss is up on his hind legs, the answer is clear.
- It’s something to do with the stone circle on the field.
- Hide down in the tunnels and wait to see what happens.
- Get its attention with an arrow, and wait for it to dive…
- At the opposite end of the room, hide and wait.
- When it pops out of the water, so does its hairy tail.
- Let it climb the wall and note where the weak points are.
- There are geysers all over the field, bursting with water.
- While riding your horse and being chased, look it in the eye.
- Find a way on top of one of the torches and wait.
- Use arrows first. Hop onto the Colossus, but jump off again…
- Those sacks on his underbelly are ripe for piercing.
- Try getting on top of one of the vertical pillars.
- When he stomps, tiles tilt, when he attacks, blocks fall.
- Not all of the weak points must be struck with the sword.
Walkthrough
Acquainting Yourself with the Game and Controls
This is the story of a mysterious young man, and equally mysterious young girl. In order to save this girl, you must journey through vast plains and mountains in a quest to defeat the sixteen Colossi which inhabit the land.
Before we begin the quest why don’t we take a moment to familiarize yourself with some of the controls. Obviously you can move around using the left analog stick. You can also use the right analog stick to move the camera around. An interesting tip here, you can use the right analog stick to move the camera during cutscene sequences as well. The triangle button is used for jumping as well as mounting your horse, we’ll get to horse controls in a minute. You can switch between your two weapons (and unarmed) using left and right on the D-Pad. The square button is used to attack with whatever weapon you are currently wielding, hold it down with the bow to charge an arrow, and release to fire. The longer you hold it the more powerful the shot, keep an eye on the pink circle at the lower right, when the white light fills it, then the bow is at maximum charge, the same applies to the sword when you are holding onto something (like a perhaps a wall or one of the Colossi.)
The R2 button zooms in the camera, useful when aiming the bow. The L1 button will face the camera to whatever direction the main character is facing. The real use of this button is during battles against the Colossi, hold the L1 button in order to aim the camera in the Colossus’ direction. Now head outside just past the platform where the girl lies, but don’t drop. With your sword equipped, hold the circle button to aim it in the air. While holding the circle button move the left analog stick, beams of light will spread and converge depending on where you move it. Whichever direction they converge in, that is the direction of the next Colossus that you have to fight.
Now it’s time to get on your horse, you can call the horse by pressing the X button. While fighting a Colossus when your horse isn’t around, pressing the X button will make you whistle to get its attention. Press the triangle button while standing beside the horse to mount it. While on the horse you can hold square or circle with the sword to get your direction, and you can fire your bow while riding. Steer the horse with the left analog stick and get him to start moving by tapping X, the more you tap it the faster the horse goes. The horse will gradually slow down, so if you want maximum speed, you have to hit the X button on a regular basis. Two more things, first of all you can stop the horse by angling down on the left analog stick. Secondly, you can look at the map with the start button. Now that you’re accustomed with the controls it’s time to venture off toward the first Colossus.
Shadow of the Colossus Walkthrough: First Colossus Guide
Finding the First Colossus
When I refer to a specific direction like north or south, you can press the start button to check your map to see which way you should be going, but most of the time you can approximate by aiming your sword and following the light. When you get out of the temple, aim your sword and you’ll see that the light points you directly south. Start riding in that direction. While you ride you can hold circle to check to make sure you’re still going in the right direction, as you point the light toward different objects, the horse too will move in that direction. Point the light in the direction where the beams converge to the sharpest point and when you eventually reach that point you’ll hit a wall.
It’s time to dismount from the horse, and make the rest of the trip on your own. You will note that so far you have not encountered any normal enemies, the reason for this is because there are none in the game. The entire experience is based solely on the battles with the Colossi, anything else would just be in the way (and pale in comparison.) Don’t worry, you’ll get to do some fighting soon, probably a lot sooner than you expect.
After the quick little scene that kind of shows the area where you are, you should be off the horse. Face directly west and there on the wall will be a kind of viny, leafy, grassy patch. When looking at your map, the yellow arrow is the direction your character is facing while the blue shape opens in the direction the camera is facing. Jump at this viny wall with the triangle button and while in mid air, press the R1 button and hold it to grab on. Once you have grabbed something, the little pink circle at the lower right corner will begin to shrink. This is your grip strength, when the circle disappears, you will fall. When you are not gripping anything, the circle gradually gets bigger as you grip returns. Also noteworthy is the meter below the circle, this is your life bar. When it depletes, the game is over.
While holding on to the wall, press the triangle button to jump up, or hold up on the left analog stick to climb. Once you grab the ledge at the top, press triangle to climb up onto it. Don’t worry about leaving your horse behind, you’ll see it again soon enough. From the perspective of climbing up, make a left when you reach the top (the other direction leads to a dead end anyway.) At the end of this path is a gap, run toward the gap and press triangle to jump over it. On the other side run left and jump up while holding R1 to grab the ledge above you, and then climb onto it. Head right (this and most other directions assume the camera is facing the default direction) and cross the wooden platforms. You’ll see another gap here that you have to jump over, and then you’ll reach a fallen pillar. You can roll underneath things in this game by pressing the R1 and triangle buttons at the same time (this can be performed while running too.) Continue to the end of this path and then jump and climb up to the one above you. Make a right here and climb again.
You should find yourself at this point on a small ledge with a rock pillar on your left, and a dead end on your right. Even though you can’t jump high enough to get on top of the rock pillar, run left and jump toward it while holding the grab button. You should be able to grab a small ledge on the side of the pillar. Now hold left on the analog stick to shimmy around to the opposite side. When you get there, hold the left analog stick in the opposite direction (from the one you’re facing) and press triangle to jump away from the while while still holding R1, you’ll grab the next ledge. Climb onto this one and follow the path to trigger a scene, here we have the first Colossus.
Fighting the First Colossus
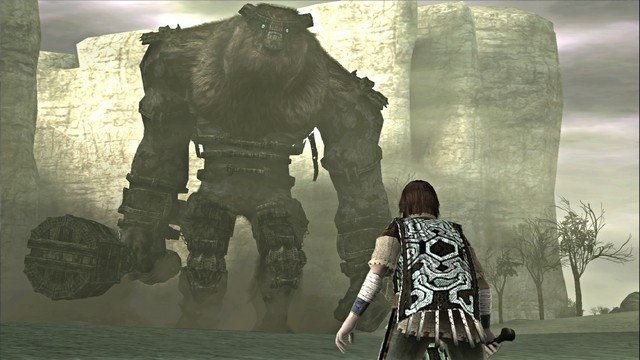
We are thrust right into battle immediately, but the Colossus doesn’t really notice you. You’re free to run around without much happening, but the instant he does notice you, some pumping battle music begins and that is when it truly gets dangerous. We should go over a couple things before that however. First of all this is your first battle, so it’s important to know exactly what you’re trying to do. At your disposal is a sword and a bow, both will come in handy but not necessarily for this battle. Colossi have weak points which are displayed as weird glowing symbols on their body, but they aren’t always easy to find. To find them you must hold up your sword and see where the light converges, that will show you the location of the weak point (and usually there are more than one.) Killing a Colossus is a matter of hitting those weak points with your weapons, or something along those lines which damages the boss (its health meter is shown at the top.) Mostly you cannot hit these points without first climbing up the gigantic beast and locating them yourself.
Remember that the L1 button centres your camera on the Colossus, that will really come in handy. Begin by holding up your sword and aiming it at the boss. From far away it doesn’t really give an accurate reading but using it closer will reveal one weak point on its head, and one on the back of its left leg, down near the foot (or hoof). Climbing a Colossi is like climbing a wall. You can’t just grab skin, but any hairy section is climbable, as well as accessories (like a bracelet maybe) and basically any surface that looks like it could pass as a ledge. Remember that most of the time there is a pretty predetermined way to climb on top of these beasts, all you have to do is find it. When you’re ready to begin fighting this boss, then run up to him, and all hell breaks loose.
As I said there are two weak points on this boss, one on the back of the left leg and one on the head. Obviously the leg is easier to get to so we’ll aim for that, but let’s take a moment to look at the bosses attacks. For the most part he just walks around, this sounds harmless but it’s actually quite dangerous. If you get near his foot when he stomps (or worse yet, under the foot) then you are going to take damage. His actual attack involves the enormous club he is carrying, he raises it into the air and slams it down. If this lands on top of you then you can pretty much say goodbye to your life (this sounds like a good time to let people know that when you die, you can retry right from the beginning of battle.)
Your goal in this fight is to get around behind the Colossus and jump at the back of his left leg. Notice that it is hairy, meaning you can grab onto it if you’re holding the R1 button. Once you have grabbed hold of it, begin climbing up using the left analog stick. A few arm lengths up there is a small symbol you will see, when you are holding the fur on top of the symbol, tap the square button one to stab, and then again to stab a second time. Note that while you are doing this the Colossus will be trying to shake you off, as long as you are holding the R1 button while he is shaking (and not trying to jump) then you will hang on, but it will do a number on your grip. After the second stab, there will be a short cutscene where the enormous giant monster falls forward.
At this point there are two ways that I know of to get up to his head, the hard way and the easy way (the hard way is what I used when I first fought this boss, before I found the much easier way to do it.) Which you use is up to you. The easy way to do it starts right here. While the boss is kneeling down after you have stabbed him, jump up and grab hold of the ledge just below the fur on his ass, then grab the fur on his ass and climb. Above you should be a reasonably large platform, climb over to the left to get around it, and then up. While holding the side of this platform, press the triangle button to jump up onto it. You’re relatively safe while standing on this platform. You shouldn’t be grabbing anything (to restore your grip strength) but you should be holding R1. Holding R1 when not near a wall makes you duck down, and while ducking you are much less susceptible to the shaking of the beast. Once you grip strength has restored, then it’s time to jump up again and limb to the higher platform. From here it’s just a matter of climbing the rest of the fur until you reach the head. Note that it’s pretty safe to run around on the Collossus’ upper back without falling so you can restore grip strength. While on the actually head he has a tendency to shake, so make sure that you are holding on (you have to be holding on anyway to do the stab.) The symbol here on his head is much larger, grab hold of the fur around it, wait until he isn’t shaking and then press and hold square. When the white charge meter that appears on the pink circle reaches its maximum, tap square to perform a powerful stab that should deal damage equal to about 35% of his total health and cause a blast of black blood to spew. All you have to do now is keep using powerful stabs, just three of them should be enough to finally take down the monster and win the battle.
The hard method I described before works as follows. After you have stabbed the mini symbol on the leg, jump off the creature and run around to the front (be careful of be stomped on here.) When he lands, he puts the climb down and on the front of the club are some ledges you can climb. Climb on top of the club (be careful because he swings it a lot) and jump from the club to the bracelet on his arm. From here you have to shimmy around back and climb up the fur on the back of his arm, there is a small platform near his shoulder you can rest on, but it’s very difficult to actually reach it before you run out of grip strength, be warned. From that small platform you have access to the fur on the upper back.
Shadow of the Colossus Walkthrough: Second Colossus Guide
Finding the Second Colossus
Take your horse out front of the temple, and lift the sword up high. You’ll find that the beam of light points directly at the temple. Well the next Colossus is not actually inside the temple, it’s actually pointing behind the temple. Ride your horse around to the back side and then as you go in the direction of the beam of light, soon enough you will reach an enormous cliff. Almost directly northwest of the temple, along this cliff is a path that is somewhat hard to see. It’s sloping down and leading north across the canyon. If you can’t find it then ride back to the back of the temple and look northwest, you should see two stone pillars that make an arch, but the middle of the arch is broken.
The path is below this arch, leading to the north. As you are crossing this bridge you should be able to make out the faint, blurry outline of a door on your right, way down at the bottom of the canyon. For the record this is your final destination, keep that in mind. Continue across to the other side of the bridge and when you get there go right and start to descend down the sloping path (a short scene should occur here if you’re on the right track.) At the bottom, turn around and go west until you hit the wall, and then turn again and ride to the north toward the door. A scene should take over here as a huge hulking creature breaks loose.
Fighting the Second Colossus
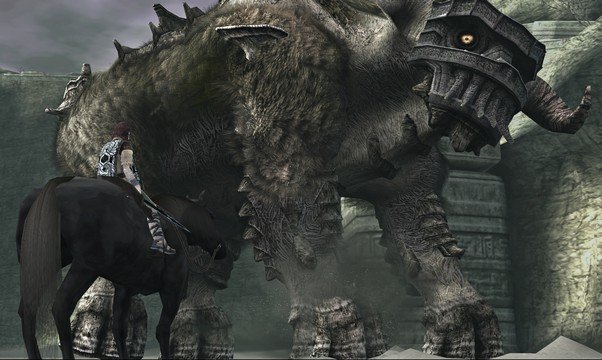
This time we will be battling an enormous quadruped, and the other difference is that you have your horse with you. This Colossus is twice as nasty when it comes to stomping on you, obviously because he’s got twice as many feet. You will also want to be aware of the one main attack he has where he lifts his two front feet into the air and stomps down with incredible power. This will actually be a good chance to hit him and you’ll see why in a minute. For now pull out your sword and aim the light.
You will see that the sword focuses light on quite a few weak points. First of all, every one of his feet is a weak point, as well as his head and his ass. The weak points on his feat are for knocking him over like the first boss, while the other ones are for doing damage. The weak points on his feet are actually literally on the very bottom of his feet, so you can only lift when he raises his feet up high. Obviously you also cannot hit these with the sword, so at least initially, the bow is going to be the weapon of choice here. Using the horse is totally optional, I don’t find it to be particularly useful in this fight.
You can try to hide behind the boss and pick at his feet as he walks around normally, but if you want to get things done right, you’ll going to have to take risks. By this I mean, you’re going to have to run around directly in front of the boss. While standing just ahead of him, this should convince him to start the attack where he lifts both of his front feet into the air. Wait for a few seconds as her lifts them up high (this attack is very slow) then when the time is right, and the target is clear, let loose a charged up arrow. If all goes well then the boss will drop. Regardless of which limb you hit, they’ve all got some fur on them somewhere, usually around back and near the elbow of the knee joint.
You can climb up this boss pretty easily, and reach the top without too much difficulty, there’s fur everywhere. Once you get up there I would recommend making tracks for the ass symbol first. If you climbed up one of the front legs it will be quite a bit more difficult, since there is no fur leading up to the shoulder you’ll have to climb across horizontally toward the upper part of the back legs, where the fur extends onto the back. Shimmy across now (don’t try to jump across as you go, do it slowly but carefully, you’ll have enough grip) and then when you get onto his lower back, stop gripping since it’s flat enough to stand safely here.
After catching your breath, move down toward the symbol near his tail end. It might not be visible at first, so climb around a bit until it appears, it’s quite big and hard to miss once it does. Grab hold of the fur in that area and charge up a sword stab attack. You will be able to damage the boss for 50% of his total health before the symbol disappears. Once it does then you’ve done all you can here, and it’s time to proceed to the other one on the head. Run across the back (you don’t have to do a lot of climbing here). You only really have to jump and climb over those bone like obstacles as you go along. It’s hard to fall unless you’re careless.
When you reach the head, walk right out above his face, you’ll find the next symbol there. You have to be much more careful though, unlike the tail end, he can whip his neck around and try to throw you off. Before you reach the symbol, be ready to hold the R1 button and grab on at a second’s notice. When you reach the symbol, you should be holding on anyway. In between head swings, charge the sword and stab. This is the last symbol so you can keep stabbing until the creature is defeated.
Shadow of the Colossus Walkthrough: Third Colossus Guide
Finding the Third Colossus
Ride the horse out from of the temple, this Colossus is going to be in approximately the same direction of the other one at least to start. Head around behind the temple and look to those two arches to the northwest I described in the previous one. Take the same path leading north across the canyon. When you get to the other side here, approximate where you have to go by holding the sword up to the light. What you want to do now is follow the light exactly, even though it’s going to lead you into a wall.
When you hit the wall, turn right and head east for a ways, while sticking close to the wall. Soon enough you should find an opening leading to the north, follow it up and you’ll come out among some trees and a quick scene will occurs. Ahead of you is a large body of water with a gigantic structure in the middle of it. Going up the side of the structure is a long path, you need to get to that path now. Jump off your horse and get into the water, you can swim just fine. Hold up on the left analog stick to swim and hold R1 to swim underwater (your grip meter becomes your oxygen meter while underwater.)
Once you eventually reach the path going up, begin climbing it until you reach the top. All you are going to find here is a stone pillar with a ledge on the side of it. You have to run and jump diagonally and grab hold of the ledge using the R1 button. If you miss it’s a long way down, and a long way back up. Once you are holding the ledge, shimmy around to the right side and then spin the camera so it’s facing in the same direction you are. Hold the analog stick in the opposite direction (toward the platform on the other side) and leap off the wall you’re holding onto to land on it. From here all you have to do is run up the path to the top. Climb up the large platform for a scene.
Fighting the Third Colossus
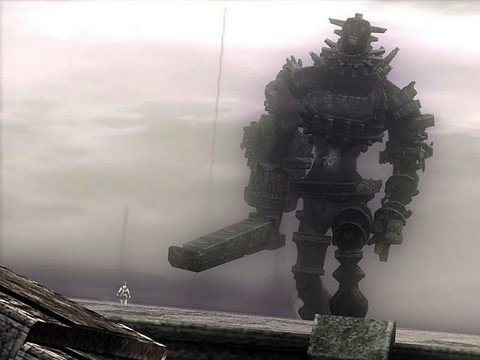
This is a really neat boss here, he’s wielding a large stone rectangular pillar, and has these neat little spheres for feat. He has two different kinds of attacks that he uses, one is an overhand stab where he crams his large stone pillar directly into the ground. The other is where he swings the pillar and slams it into the ground horizontally, rather than vertically. When he does the second one, it creates a ramp that you can run up and that will be an important part of the strategy for this battle.
Unfortunately if you try to run up the pillar after he slams it down you’ll find there is nothing you can do. His bracelet is so big that when you try to climb past it, well, there just isn’t any way to get past it. The solution is quite simple. Note that in the middle of the field there is a flat stone platform. Well what you want to do is stand on this platform and wait for the boss to attack. When he eventually does attack, he’ll hit the platform with his pillar and the force of the collision will actually shatter the bracelet he’s wearing on his right arm!
Now it’s time to really take on the boss. Wait for him to do the overhead attack where he slams his weapon onto the ground, and then run up it. No need to climb, just run. When you reach the top, jump and grab hold of his arm hair and begin climbing. Along the way up, when you get a chance, climb around to the back of his arm, it’s easier to get up from there. If you need a rest then you can easily drop down onto the large broken bracelet, the part on the back is still in tact. Climb up the back of the arm, and from there onto the back. The first weak point of this boss is located on the top of his head, you’ll have to climb his neck to get it.
Whip out the old sword and jam it into the top of his head. Up here he likes to flail wildly so it can be pretty difficult to hold on. Keep stabbing until you have dealt damage equal to about 50% of his life, at that point the symbol is going to disappear. That’s only one of the two located on his body, but don’t worry, the other one is quite easier to find. What you want to do next is run down his back, right in the middle. Grab hold if you need to, there should be kind of a stone object at about the point where his back goes from being slanted, to being straight down. Grab hold of this stone object and hang, then let go of it entirely. As you drop down his back hold the R1 button. One of two things will probably happen, either you will grab the ledge around his hip area, or you will land on it without even grabbing. There is very little chance of actually missing it since the ledge extends out quite far.
Move around this circular ledge to the monster’s belly. On his belly there you will find the second weak point covered in fur. Climb up it and get ready to do some more stabbing. It’s takes quite a number of stabs, and he kind of likes to do The Twist while you’re hanging on for dear life, but the platform is right below you so taking a rest is easy. Once this symbol has taken enough damage, the entire boss is done for.
Shadow of the Colossus Walkthrough: Fourth Colossus Guide
Finding the Fourth Colossus
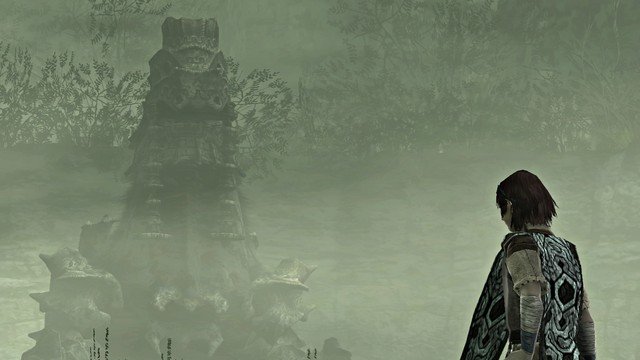
When you leave the temple this time, your sword will direct you to go directly southeast, so follow it. Eventually you will hit a wall, when this happens make a left and follow the wall along as you proceed east until there is an opening that continues southeast. Follow this foggy path for quite a long ways until it leads you out to a nice green area. There’s a cliff in front of you so what you need to do is follow the path that goes around between the cliff and the wall. When you get down to the bottom, aim yourself toward the opening but don’t go down there. There will be a time when you do have to, but it’s not right now. Instead proceed east past these openings and at the end of this secluded area, there is a Colossus lying on the ground in wait.
Fighting the Fourth Colossus
It’s a face off against another quadruped, this one with sharp feet and a tall giraffe-like neck. You will likely notice there is absolutely now way, no matter how hard to try, to climb up this thing. Since the sword identifies the weak points as being really high up and not visible you’re going to have to find some other way to take on this beast.
The solution is as follows, it’s now time to make use of all those entrance doors you passed just a little ways back. Ride the horse over there and wait as the Colossus follows you. The Colossus has a nasty attack where it stabs the ground with one of its front legs over and over again. Fortunately since they are so pointy, this attack is quite easy to dodge. Your goal now once you reach this point is to jump down and run through one of the doors. Descend down the stairs. The hallway here will lead you around in a square and back to where you came in. You can exit at any of the points. Pick one set of stairs and stand at the bottom.
Just wait here as everything shakes, and soon enough most shaking should stop entirely, when this happens what you need to do is stand at the bottom of each of the stairs and look up outside. At one of them you should see the Colossus’ head, it is trying to peek inside to find out where you are. Let it peek. Run to the one on the opposite side and exit there. When you come out you will be behind the large beast and it won’t notice you. If he starts moving at any point just stay hidden and soon enough he should duck down again, looking through the same door.
Run up to the Colossus from behind and note his tail, it has two ledges on it, bingo. It’s a little bit high to run and jump, I find it easiest to just stand right beside it and jump vertically, holding R1 to grab on. I imagine you could also jump off your horse and grab it if you accuracy with the horse jump is good. The second you grab hold of the fur, the monster will know you are there and begin shaking its ass wildly. Hang on as best you can and climb onto the back, where you can just run without holding on too much. Keep running until you reach the neck.
There is a small weak point here like the first boss had, when you stab this with a weak stab twice, the boss will lower its head down. This is your chance to run along it, right to the top of the head above the face. You’ll find the primary (and only) attacking weak point here. Grab hold of the fur and start using charged up stabs to defeat the monster. He likes to really shake his head around so it can be heard to hold on at times, but it’s relatively safe to let go in between shakes here if you need a break. Since it’s the only symbol, the boss dies when it’s gone.
Shadow of the Colossus Walkthrough: Fifth Colossus Guide
Finding the Fifth Colossus
Mount your horse and get yourself out of the temple. The next Colossus is located approximately east of here, aim your sword high and follow the path where the light converges. As you follow the light of the path exactly, it will eventually lead you to a canyon. Make a right when you hit this canyon and you’ll find that it leads you around between the wall and the canyon safely toward a much more open area. When you reach this place lift the sword high again and the light should aim you to a path between two walls.
Just a short ways down this path you will reach a point where the horse cannot continue, there is nothing but water in front of you. No matter, just jump off the horse and jump in the water. Note the very large wall ahead as well, in the middle of the wall there is an opening, but you must be underwater in order to get through it (hold the R1 button to dive remember). Pop up on the other side and look straight ahead, you’ll see a number of ledges which you can climb up. At the top there’s a short bridge to cross and a scene.
Fighting the Fifth Colossus
You won’t be able to get the attention of this Colossus just through whistling, so that means you have to use the other way of getting something’s attention from a distance, your bow. You’re still too far away at this point so note the cracked ground right beside where you start, drop down here and you’ll land in the water. From here you want to start swimming east, with a very slight southeast tilt. In between two of the large stone structures you should find a few platforms which protrude only slightly out of the water. Swim up beside one of these platforms and hit the triangle button to jump out of the water and up onto it.
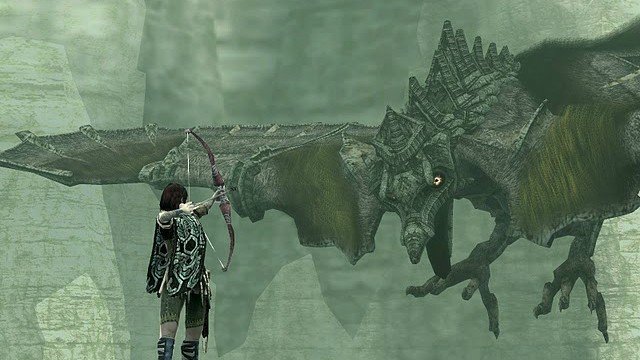
Equip the bow and hold the square button to charge up your shot, then hold the L1 button to automatically look at the boss, and fire. This will definitely get his attention and he takes off from the perch and begins to fly around (if he flies down near you so just part of his wing is about to clip you, drop in the water to be safe.) Now the boss will begin attacking, especially if you keep shooting arrows at it. The boss’ one main attack is to dive out of the sky head first directly at you, and obviously this is going to be the only means you have to get on him.
Keep firing arrows from your platform as the boss flies through the sky. Remember the age old Space Invaders logic of shooting not where he is, but where he is “going to be” since the arrows have travel time. Eventually when the boss gets mad enough it will swoop down toward you, and this is your chance. There is fur on the boss wing where it meets the body. You need to wait until the timing is right, then jump forward at this fur and hold the R1 button. If all goes well then you are now holding on. I forgot to mention, if the boss keeps swooping but never close enough to grab on, try jumping over to the next platform. The boss isn’t so much swooping directly at you as he is swooping between the two large stone structures, so you can move to the next platform and try from there.
This is where it starts to get interesting. Unlike other bosses you cannot simply take a break on any flat surface, there is strong wind resistance that will push you along and blow you off if you aren’t careful. It’s still possible to let go for a short period of time, but you have to make sure the boss is moving straight and calmly, and grab hold again at any indication of change. We’ll begin with the two more difficult symbols to hit, because you are closer to those ones.
At the tip of each wing there is a symbol and you will have to reach them. In the middle of the wing there is no fur so that’s going to make it more difficult. What you need to do is hold onto the fur of whatever wing you are on, and wait until you get a few seconds of calm. At that point quickly let go and run like mad across the wing in an attempt to grab the fur near the tip before the monster starts to flap its wings again. Once you have hold of the fur you’re relatively okay. The symbol is right here below you, equip the sword and you will see it in the middle. You need to charge up one single attack and stab down into the wing. This symbol and the one on the other wing can only take one charged up hit before they disappear so after stabbing once, get back to the main body. This is good because after the stab, the monster flips upside down and you lose a hell of a lot of grip strength. It’s no big deal if you fall of course, you’ll lose a lot of time, but you can get back up always the same way you did before. Either way you now need to do the exact same thing, except you must get to the tip of the other wing this time.
Finally once the symbols on both wings are gone, there is one more remaining. This symbol is at the very tip of the tail. What you need to do is get onto the main body and then when things calm down a bit, let go. Begin running as fast as you can down the body toward the tail. If he starts to turn at any point, simply grab on wherever you are. When you eventually reach the tail there is a large symbol there which you can start stabbing like mad. It’s the last one, so it will kill the Colossus.
Shadow of the Colossus Walkthrough: Sixth Colossus Guide
Finding the Sixth Colossus
Now we head in a brand new direction, and that direction is southwest. Follow the light of the sword exactly as it directs you toward the mountain. When you hit the wall, make a left and turn more in a southeast direction. Follow the wall around and there you will find a path that goes between the wall and a nearby canyon, in a southwest direction. There is a forest here that you have to pass through, it can be difficult at times to get the horse to where you want to go, but if you reach an impasse then just go around. The exit to the forest is on the far west side, with a slight angle toward the north. It will lead out to a sandy path that goes through a large rock tunnel and opens up into an enormous desert. Check the light of your sword again at this point so you know where to go.
The light points you in the direction of an enormous stone wall, you don’t have to climb this wall, but note the path going through the middle of the platform in front of the wall. There is a set of stairs leading down below the ground into an underground hallway. Climb over all the crates and stones until you reach some kind of massive room. To get down from the bottom, take a few steps forward and when you reach the edge, hold the R1 button and walk off. The entire wall here is made up of small ledges so you can hang and drop, hang and drop all the way to the bottom to find the boss.
Fighting the Sixth Colossus
Another giant hulking traditional Colossus waits for you here. Equipped with no more than his hands and an angry temper. The room is big so it can be difficult to figure out exactly what you have to do, but once you know it’s not that difficult. First of all you should know what attacks the boss uses and how you can avoid them. He’s got two primary attacks, one where he punches the ground very hard, this can be dodged by running to the right. The other attack is when he stomps his foot onto the ground, when this happens make sure to jump just before it hits, even if you aren’t close, the shockwave will damage you from a pretty big distance. It’s interesting to note with the punch attack that after he punches the ground, you can grab onto the hair on the back of his hand and climb from there, but you can’t get past his bracelets (at least I wasn’t able to.) There isn’t really any point in this and it’s not the best way.
What you have to do is gradually make your way to the south end of the room, which is the opposite end from where you came in. Along the way there are walls. Each wall has a number of small platforms along it that you can climb up, and then from there, jump up and over the wall. Another way to get past the wall is to wait for the Colossus. His punch attack will smash the wall down leaving a huge gap you can simply run through. Basically all you want to do is run to the other end of this room with the Colossus following you. When you reach that point then we can climb.
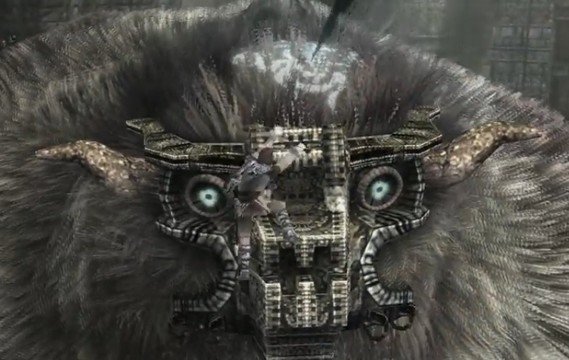
At the end of the room if you run up the small stairs you’ll find an area between the pillars which is under the ledge above, and pretty much offers you a hiding place from the Colossus since it is sheltered, this place is very important. Stand in this little sheltered area, as close as you can to the wall at the back. The Colossus will approach but not be able to see you. After stepping around a little bit, he will finally and inevitably, bend down to try and peek into your little hiding spot. When this happens, his massive beard droops down to ground level and I think you know what to do at this point. Surprise! You found me! Now I’m going to run and grab onto your beard! That’s the idea here.
Climb up the beard, hanging on tight whenever he gives it a good shake. Once you manage to climb around his head and get onto his back, it’s reasonably safe to take a test, but he will still shake from time to time. The first symbol is located directly on the top of his head. When he isn’t shaking like crazy, quickly run and grab hold of the hair on his head. This boss has a really wild swinging motion of the head that will do a number on your grip, so you want to attack quickly and always remember you can go back onto his back to take a break when you need it. This isn’t the only symbol, so you only have to damage 50% of the boss’ health before it disappears. Destroy the symbol and get onto the back.
The second and final symbol is located actually on his lower back. What you need to do is run down the spine and hang onto the fur where his back curves to a vertical slope. Climb down the back, and move over to the left, the symbol is actually off-centre and on the lower left side of his back. He’s got a pretty crazy shake that he uses to try and get you off his back as well, but by this point you should be able to get the better of him. Three or four powerful stabs and that’s the end of him for good.
Shadow of the Colossus Walkthrough: Seventh Colossus Guide
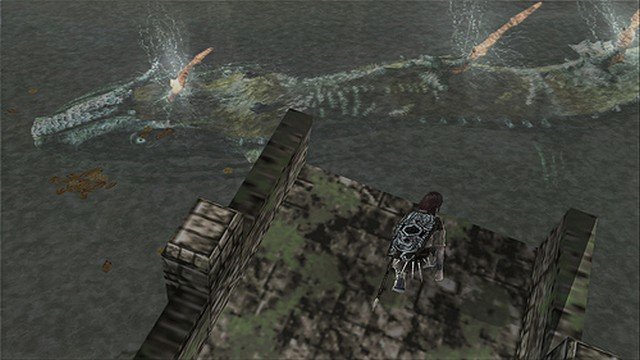
Finding the Seven Colossus
Remember the path you took, north-northwest of the temple between the two broken arches that leads north across the canyon? Well you’re going to be taking that path again. If you don’t remember the one I’m talking about, I think that first sentence explains it well enough anyway. When you get across, point the light and it will lead you straight into a mountain. Make a left when you hit the mountain and follow along the wall until there is an opening. This may look familiar, it’s the same one that took you to the third Colossus. When you reach the large lake here, instead of jumping into it, go around it to the northwest side and you’ll find a path that leads away from this place up through the mountains.
Follow the path here as it takes you north, you will reach two forks in the path along the way. Go right at the first fork and then right again at the second fork. If all goes will you will pop out in a more sunny area similar to the main field. When you reach this place, if you look at the light from your sword it should be pointing northwest, meaning you have to turn left. Ahead of you here will be very tall and thin pillars, if you don’t see them then you probably aren’t in the right area, just use your sword to guide you (and remember there is usually more than one way to get somewhere.) Follow the light and it will lead you to a very long wall with a door in it, just large enough to fit you and your horse. When you go through this door, if a short scene triggers on the bridge, then you’re in the right place. Ride your horse to the end of the bridge, and get off. Jump onto the spiral thing and run down it, when you hit the water at the bottom, whether you run to the end or fall, you will see the boss.
Fighting the Seventh Colossus
Another totally different experience here, this Colossus is an underwater amphibious electo-monster. You fight this thing while actually in the water, which shakes things up quite a bit and means your strategy is going to have to take into account the fact that you cannot breathe underwater forever. The boss attacks with those three large electric spikes on its back, but you won’t really have to worry about those until the times comes to actually fight the boss. For the most part while you’re in the water just swimming around, he’s really surprisingly quite harmless.
When it comes to actually grabbing hold of the boss it can be quite difficult. It likes to swim around in the water but will on occasion, turn toward you or at least close to you. When you see the boss swimming toward you, move yourself so that he will pass right under you. Much of the time when he does this, he angles himself down which angles the tail up, and that’s how you grab hold of the boss. For a second or two the tail will pop up out of the water and move toward you, so all you need is to be holding the R1 button to grab the fur on the tail. Once you have hold of the tail however, the fight is only beginning.
You won’t need to worry too much about oxygen, even though it may see that way at the start. When you have hold of the boss, instead of swimming around calmly underwater, he swims around quickly and violently on the surface of the water, surfacing and diving over and over again. Since you can’t really do anything while underwater besides hold on for dear life, your job when the boss surfaces is to let go and run like hell as far up the body as you can. Right when you see he is about to dive down underwater again, grab hold of the fur on his back and don’t let go.
Soon enough after repeating this process a couple of times, you’ll approach the first spike which can actually get dangerous. You may have noticed that for the most part, you can beat the other bosses without any risk of actually “dying”. Well you can definitely die on this boss, each spike emits a huge blast of electricity as it dives underwater so here’s what you need to know. Just below each spike is a small trigger symbol. You need to keep your distance from the spike until you surface. At that point run and jump to the symbol just below the spike, and immediately execute a charged up stab on the symbol. What this does is destroy the electric current in the spike, and make it so you won’t take any damage when the boss dives. If you aren’t fast enough to destroy the symbol, then you’ll be electrocuted once or even twice when you dive. This won’t knock you off fortunately, but it will damage you quite a bit.
With the first one down it’s just a matter of repeating the process for the next one, and then the third one. As you get further and further up the body, you will find that you have to start jumping in order to get over some of those stone obstacles. With the third spike destroyed and the boss approximately half dead, you are now ready for the main course. The final symbol is located directly on top of the boss’ head. Climb up there and begin stabbing like your life depended on it, charging your attacks as much as physically possible. This is the last symbol so when it is destroyed, the boss dies and you’re back to the temple again.
Shadow of the Colossus Walkthrough: Eighth Colossus Guide
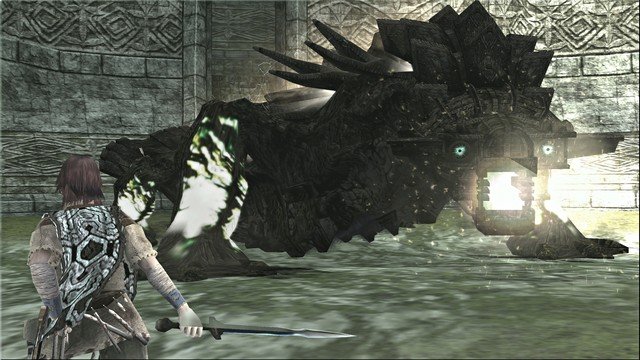
Finding the Eighth Colossus
This trek will take you south, in a similar direction to the very first Colossus, but with more of a west angle. The beam of light leads you almost to an opening between two large cliffs, go between these walls and follow the path down the hill. It should soon enough lead you to an open area with an enormous wall ahead of you. In this wall is a small tunnel, still leading south, that’s the path you want to take. At the end of this path the horse will stop at the cliff. At this point I would recommend getting off the horse, you don’t have to get off now but the horse will move very slowly through this area. You’ll have to leave it behind soon anyway.
Take a good look at the waterfall as you pass through here, it’s really a nice little walkway that takes you on a zig-zagging path to the other side. You’ll pop out in front of a large body of water in the next area, and in the middle on a small island you can see some kind of structure, that is your destination. You can either swim over to it, or make a right and there will be a path on land that curves around in that direction. When you reach the temple, go inside of it and descend down the stairs. At the bottom it will seems like a dead end but in fact it’s not. Look up in the room to see a walkway above. You need to go toward either of the two pillars and stand on the higher side of them, there are ledges on these pillars which you can grab. Get hold of them and begin pulling yourself up one by one. At the top, shimmy around to the opposite side and jump off onto the walkway. This takes you to a pit where you’ll drop over the edge. Climb up the blocks ahead of you to reach the top again, and just a little bit further is the Colossus.
Fighting the Eighth Colossus
You start out quite a ways from the boss. Of course you can find a crack in the wall and jump down, but if you want to do it without getting hurt, you have to either take one of the many sets of stairs around the circular hallway, or grab the ledge and drop one by one. When you get down to the bottom you’ll find the boss, a large iguana like creature, running around in the centre. It took me longer to figure out how to defeat this one than any other one you’ve faced so far. Basically you will note the very obvious symbols on his feet. If you jump onto his back, that glowing electricity is going to knock you off, and there’s nowhere to hang onto. You’ll have to find another way to damage this boss instead.
This is by far the most difficult battle in terms of being killed. You will likely be killed here, unlike most battles, if you don’t know what you’re doing. First of all the main attack of this boss is an electricity laser breath attack which fires a number of projectiles ahead itself. While these projectiles will do a bit of damage to you, it’s actually the electric energy that they leave behind on the ground that will hurt you the most. After this attack occurs, wait a good ten seconds or so before you run through the area where the projectiles hit to avoid damage.
Besides this the boss also has a very powerful tail swipe attack. If you get too close to the tail he will swing it around and damage you for almost 40% of your total HP, that one really hurts, so stay away from the tail. Trust me, you can’t climb up anyway. That about covers all of his attacks, he can still step on you if you really get in the way, but this is extremely uncommon since there is very little reason to get close.
As you may have figured, the weapon of choice for the beginning of this battle is the bow. When you shoot an arrow at any of his feet, the monster will react in pain but nothing will really happen. You’re on the right track, but doing it the wrong way, here’s what you have to do. Make sure the boss knows you are there (I say this for people just starting the fight, an easy way is to press X, the whistle gets the boss’ attention.) Once he knows where you are, climb up to the second or third level hallway and stand out of sight near the wall so you can’t be hit by any projectiles. Suddenly the Colossus will begin climbing up the walls to search for you, and that’s the trick. Let’s say he’s climbing up the wall on the same side as you. You then need to run around to the other side.
Take aim at the creature high up on the wall with the bow, aim at any of his feet and fire off a fully charged arrow. When you hit one of the feet the monster should react. Now is your chance: aim another arrow at a different foot and fire. When the second arrow hits, two feet are not enough to keep him attached to the wall and the boss plummets to the ground, on his back. Here’s another chance, don’t worry about damage, leap from here down to the ground through a crack in the wall and run up to the boss. There is fur covering his underside so you can jump onto him from the tail end and find a symbol on his belly. The rest is obvious, whip out the sword and start using charged attacks. When the first symbol is gone, there is another one on his belly, just higher up. You probably won’t have enough time to finish him off before he flips back over, but when he does just climb up again and repeat the process.
Shadow of the Colossus Walkthrough: Ninth Colossus Guide
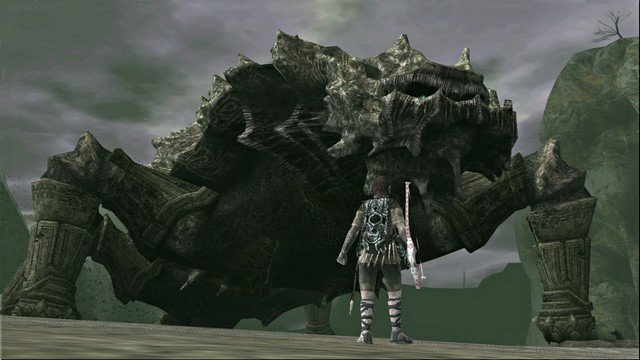
Finding the Ninth Colossus
Take your horse and go a little bit north of the temple, and then a little bit west between the broken arches and take the path that leads north across the canyon. When you reach the other side and hit the field again, make a hard left toward the west and use the light from your sword to guide you, it will point in virtually the exact direction you should be moving right now. It’s kind of hard to explain this next part. Eventually it will lead you right into a wall, at that point you have to turn and go directly west. You’ll enter a region of darkness with a canyon to the north. Follow the edge of this canyon until you come across a thin path that acts as a bridge to get across the canyon to the north. When you get to the other side turn around and face east again. Make your way in this direction to trigger a scene.
Fighting the Ninth Colossus
The ninth Colossus is the biggest one you’ve faced yet by far. A quadruped again, and an enormous one at that. You’ll find him in the cave, but when you go up and try to figure out exactly how it is that you’re supposed to hit him, you’ll likely find it quite difficult to hit him at all. There is a reason for this and I’ll get to it in a minute.
The boss, like most, has two primary attacks. The one is the usual where he lifts his from legs up in the air and slams them down for a shockwave so powerful you should jump whenever it hits the ground. The second attack is the one which is far more powerful and dangerous. Similar to the previous boss, this one can fire blasts of energy out of its mouth. The difference is that they do a lot more damage and hurt you right away, rather than sitting around waiting for you to run through the electrical after-current. Always run, jump and roll to avoid this attack.
When it comes to actually damaging the boss, you won’t be doing it in this cave that’s for sure. It’s pretty damn dark in here, and light is a good enough reason as any to lure him away (but the main reason is of course completely different.) Notice that outside of this cave from the way you came there is an enormous open field. Littering these field are little openings in the ground, these are geysers. They will randomly spray up water periodically and will play an integral role in your victory.
Basically what you have to do is run around the field, either on foot or on horse, and lure the hulking beast over top of one of these geysers. If one of them blasts water into the air while the monster is above it, the monster is going to be knocked off balance. When you use the sword to pinpoint the Colossus’ weaknesses, they are all in his feet but you can’t see them. When a blast of water shoots up, it knocks him off balance and suddenly two of his feet tilt to the side while the other two area in the air. With the two tilted feet, the ones which are still touching the ground, you can now see the symbols on them. Stand under the beast and whip out the bow. Fire a charged up arrow first at the back foot symbol, then the front foot symbol. If nothing happens just keep doing it. Soon enough the monster will topple over on its side, but there’s still more.
You need to run around to the belly side of the monster which is covered in hair. There are a few ledges for you to grab on your way up to his chest hair. Now what you have to do is climb up all that hair to the top side of the monster and kind of position yourself on the edge. When he gets his balance again and rolls over, you will end up on his back and that’s exactly where you want to be. Unfortunately there is next to nothing for you to actually grab while on his back, so be careful up here, and duck often. Gradually make your way to the head, that’s where the main symbol is. On the very top of his head there’s some fur you can grab onto. Grab the fur and begin using chare up attacks. This is the only symbol on his entire body so once you take this out, the boss is dead.
Shadow of the Colossus Walkthrough: Tenth Colossus Guide
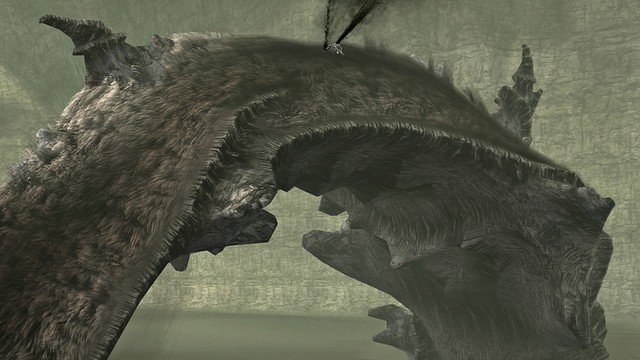
Finding the Tenth Colossus
You’ll find this one at almost the far west end of the world, it’s your longest trip yet. Here’s how to get there: you want to start by going to the exact same spot you went for the last one, to the field with the geysers. Cross the north canyon above the temple then go west and a bit north to find the geyser field. Once you reach this field, keep going north and there will be kind of a red path that leads away from it. Keep going west from here and you’ll be able to curve around the mountains and start heading a bit southwest. The path here is pretty linear, just go west through this nice green field with the large body of water in it (go around the water, not through it) and eventually in the next area the light from your sword will lead you west straight into a wall. At this point turn and look south, you should see the entrance to a cave. The cave leads you down a tunnel and pops you out in a huge underground room fit for a battle with a Colossus.
Fighting the Tenth Colossus
Figuring out how to actually hurt this one was a definite ordeal, but when you start running around the field and thinking about it, the idea does come. You’re battling a gigantic sand snake here in this wide open room, and for the first time yet in the entire game, the horse will play a necessary key role in your endeavor to actually defeat the boss.
We continue with another boss that easily has the ability to kill you, rather than just knock you out of the way. As it speeds through the sand it’s primary attack isn’t really an attack at all, it’s just being creamed by the monster as it shoots by, dealing damage equal to more than half your health. The only other thing this boss does that could really be considered an attack is the large jumping leap he does after every long chase is finished, but this will rarely hit you. More often than not you’ll just be slammed by him as it you were hit by a train.
The trick to actually damaging this boss is as follows, and it makes for a really fun battle. First of all you have to be in your horse. Pick up speed and just run around the room. Inevitably the boss is going to begin chasing you down. When he starts to give chase, hold the L1 button to turn around and face him. You won’t be able to see what’s in front of you, but the room is large and for the most part you should be able to avoid most things. Now while facing the boss wait a few seconds and he should begin to pop his head up. See those big glowing coloured eyes? That’s the answer to all of your questions right there in front of you.
With the bow equipped you have to turn around and aim an arrow. Don’t charge them up at all, you can’t move your crosshairs and charge and ride simultaneously. Just keep the crosshairs as close to one of the eyes as you can and tap the square button wildly. Once a single arrows gets in his eye, you’ve done your job. He’ll spin out of control until he eventually crashes into a wall, and that means it’s now your chance.
Ride the horse around to the tail end of the boss and launch yourself off. Climb up the fur on his underbelly with the sword equipped and a symbol will reveal itself. This is only one of two symbols, you should be able to stab it enough to damage the boss about 50% and then the symbol will disappear and he will roll over. On the next run, climb even higher. Once you get to a certain point you can run instead of climb and save your strength but be careful, at a certain height he’ll start shaking his entire body like mad. Grab hold and stab the enormous symbol over and over again. There are only two to eliminate and once you do, you win.
Shadow of the Colossus Walkthrough: Eleventh Colossus Guide
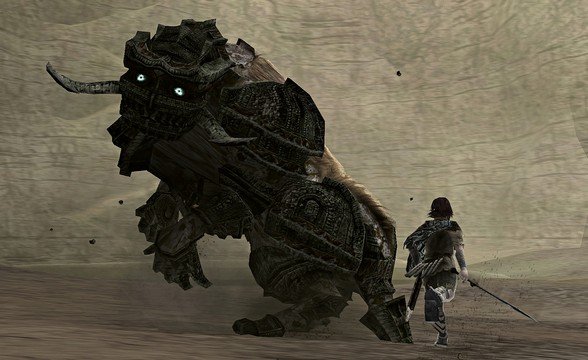
Finding the Eleventh Colossus
To find this one you’ll be traveling north, pretty much parallel to that huge bridge you crossed in the game’s opening cutscene. However you want to get there is pretty irrelevant, you can take that bridge you’re probably used to using to cross the north canyon. Stay directly beside the pillars holding up the immense bridge, but on the east side of them as you ride straight north. Eventually when you begin to approach somewhat close to the top of the map, maybe about one sector down, you’ll find a very deep canyon on the west side of the bridge with your light pointing down into that canyon. To get down there what you need to do is ride over to the far east side and dump horse.
There is a zig-zagging path here leading down into the canyon, take it without the horse all the way to the bottom. From here you don’t have any light to use your sword, so simply head west and up the sloping path. At the top you will find the entrance to some kind of temple. When you get in there and jump across the gap to the main room, you’ll be attacked by a Colossus.
Fighting the Eleventh Colossus
Without a doubt, the tiniest Colossus you have fought yet, and ironically, probably the most difficult. It can be pretty frustrating fighting this guy at times because he is about the polar opposite of all the other ones, short and fast rather than huge and slow. You always have to be ready to dodge and roll here because you’re always under attack.
This Colossus has two main attacks, the first is where he runs fast and rams into you. This will knock you onto the ground for a long period of time, you definitely don’t want to be rammed. Try rolling out of the way before you get hit, or running to the side and rolling, or hiding or whatever it takes. When the monster gets close and isn’t running, or you’re hiding, he’ll use one of his front claws to try to claw you. The first attack does almost no damage, the second ones does a bit more.
Since there don’t seem to be any discernible weak points you will want to know how to damage the boss, well here’s how. Notice that around the room there are four flaming torches. These play a very important role in the battle. What you have to do is go between the torch pillar and the wall, then use the ledges on the side to climb up to where the torch is. While standing beside the torch, the Colossus will ram into it and a flaming stick will fall to the ground. When you feel it is safe then quickly jump down off of this thing and pick up the stick using the R1 button.
When it’s in your hand it won’t be flaming at all. What you have to do is climb back up to another torch and swing the sword with the square button to really light it ablaze. Now jump down and suddenly the boss won’t be trying to ram you anymore, he’s petrified of you. As you walk slowly toward the boss, the boss backs off to stay away from you. Note that if you get too close he will take fearful swipes at you, and these really hurt, stay a good distance back and walk toward him, not run. Opposite where you entered from there are a number of pillars and past them, a large cliff. You get the idea, slowly walk toward the boss in that direction and lead him to the edge. When he backs off far enough he will lose his balance and fall off the edge. The fall cracks the armour on his back and reveals the furry weak spot right there on his back.
Now this is very important, for a moment he is totally immobilized. What you have to do is press left or right on the D-pad to equip the sword again, then walk over the edge. Now look down and you’ll see the boss laying there. Run over the edge and try to land on top of the boss, it’s actually quite easy, just don’t jump. If you grab hold of him from the fall then you can charge up the sword and stab. One charged attack will do exactly 50% damage toward his total health. A second one will kill him. If you somehow miss or fall off, then it gets a lot harder. Unfortunately getting onto his back a second time, unless there is some magic trick I don’t know about, is difficult. The best way I could find to do it is as follows. Run up the sloping path (not the one you came down to enter the canyon, the other one) and it will lead you to a stone ledge that you can climb up. Let the boss chase you here then climb up onto the ledge, turn around and jump on his back while holding R1. It may take a few tries and practice, but it’s quite possible to get up there again.
Update: Many people have emailed be over the past month making the following comment. Once you have scared this Colossus off the edge and broken his armour, you can actually pick up a flaming stick again (and again) scaring him off the edge making it easier to get on his back.
Shadow of the Colossus Walkthrough: Twelfth Colossus guide
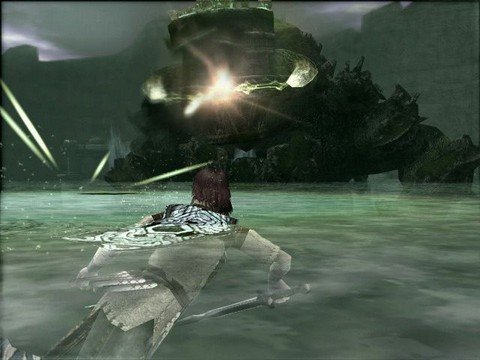
Finding the Twelfth Colossus
Northeast of the temple there is another winding bridge which crosses the canyon, we’ll take that one this time to get across to the north. When you get across, angle yourself a little bit to the east and soon enough you should see a couple of large cylindrical pillars in the distance, you want to go between those. This will take our across a bridge and into a forest. In the forest what you have to do is make a right turn as soon as you can, then another right turn and take the other southern exit, just east of where you went in. You’re pretty much doing a big U turn, but leaving the cave through a different exit. When you reach this area you’ll find there is a thin path that goes between the wall and the canyon. Make your way along this path until you reach a dead end, at this point it’s time to abandon the horse.
Beside you at this dead end is a large cylindrical pillar. Jump at the pillar and hold the R1 button to grab hold of the ledge that circles around it. Shimmy around to the other side of the pillar and jump onto the path. Make sure that you don’t jump into the water, you’ll be washed over the edge and well, die. Follow the path up to the top and then when the path ends, jump into the water from there where it’s calmer. You can see a huge opening in the wall ahead of you. Go through it to find the next Colossus.
Fighting the Twelfth Colossus
This Colossus is a royal pain in the ass. Not only is it the most difficult so far to figure out how you’re supposed to beat it, but even when you know how it’s still a pain in the ass. You’ve got this enormous Colossus hulking around in the water and you have to find some way to get on top of it. The solution is easy enough, but hard to execute.
This boss only has one attack, but it’s definitely enough to kill you if you aren’t careful. It’s the exact same attack the boss on the geyser field had, energy projectiles that really hurt when they hit you. Fortunately there is always a way to avoid them. When you’re in the water, swimming underwater will allow you to avoid them every time. For avoiding them out of the water, read the boss strategy below.
What you want to do is swim underwater to one of the three sheltered areas. Under the shelter of these areas there is a kind of raised object in the middle. Position yourself behind this object relative to the Colossus and hold the R1 button to duck down. Now not only will you avoid all of the projectiles, but you will be restoring health at a reasonably good rate. Stay here until the monster gets closer, as close as he can possibly get. When this happens it’s time to start attacking.
The structures each have a little raised by of stone sticking out some of the sides where the support pillars come down, these will come in handy in a moment. What you have to do is fire an arrow at those weird coloured stones on the head of the behemoth. Doing so will cause him to lower his head down. When he does this he should be close enough for you to stand on this stone platforms I mentioned and jump right at his face. If you’re holding the R1 button and you’re lucky, you’ll grab one of the edges around his mouth area. Hang on while he shakes his head around and then when he lets up a bit, jump up from ledge to ledge until you are on top of the head. Unlike other Colossi however, you’re not quite there yet. You can run over his entire body if you wish but you aren’t going to find any symbols to hit. In order to find it, there’s still more jumping to do.
Remember in Super Mario 64 when you stood on the head of the monster in the Hazy Maze Cave and directed it by facing in different directions? Well regardless of whether you do or don’t, the premise is similar. You’ve got coloured stones on the right side of the Colossus’ head, the left side of his head and the front of his head. When you have the sword equipped and you slash one of the ones on the left, he will turn left. Slash the one on the right and he’ll turn right. Hit one of the ones on the front and he’ll move forward. In between hitting them you’ll have to hang on of course to avoid falling. Your goal is to direction the head of the Colossus back to one of the stone structures. When you are as close to one as you can possibly get, wait until the head of the Colossus is high and then take a mighty leap to land on top of one of the shelters.
Up here you have a raised stone object too that you can use for cover and you’ll need it. Wait for the monster to let off a few projectiles, then he should move toward you. If he seems to be ignoring you, either show yourself, whistle, or shoot an arrow. Before long the Colossus will approach the stone structure with you on top (hiding behind the object in the middle) and raise his arms onto the structure itself. Now it’s finally your chance to attack. His belly is exposed since he’s up on his back legs, run up and leap off the structure and grab hold of his chest hair. There is a huge symbol right here on his belly, charge up and stab away. You will have time for two full stabs, and one partially charged stab if you want it before he drops back down into the water. As far as I can tell there is no way to kill him on the first try, but it is the only symbol on his body, so all you have to do is the exact same thing you did the first time to beat him. It’s harder than most, but you’ll manage.
Update: Just as many people have made a suggestion regarding this Colossus as well (thanks to every one of them.) If you’re having trouble with this method, then simply try jumping into the water and swimming around to the back of the Colossus to climb up it via the tail. into the water from there where it’s calmer. You can see a huge opening in the wall ahead of you. Go through it to find the next Colossus.
Shadow of the Colossus Walkthrough: Thirteenth Colossus Guide
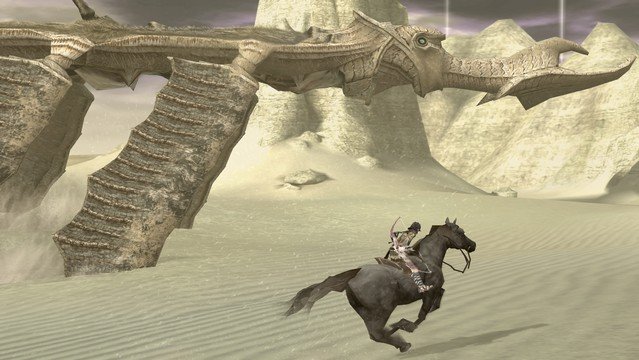
Finding the Thirteenth Colossus
This next Colossus is located actually along the same path as a previous one, but not quite as far. Hold up your sword outside of the temple and follow the beam of light southwest. It will lead you all the way to a path going through a small forest that you’ve gone through before. At the northwest end there is a path leading out that you should have taken before, the one that goes through the tunnel and then out to the enormous desert. When you hold up your sword again it will direct you to a small area of broken ruins. When you ride your horse into this little area specifically, the Colossus will appear.
Fighting the Thirteenth Colossus
This is definitely one of, if not my favourite battle against a Colossus. You’ve got another flying enemy similar to number five, but he’s quite a bit bigger, and getting on top of him is a lot of fun. You’re going to need your horse for this battle, and given that you’re facing a flying enemy, the bow will turn out to be very important as well. This creature moves around in the sky without really posing much danger to you at all. I would say this battle is a good throwback to the original ones you fought earlier in the game. First of all, it’s not difficult at all to figure out how to hit him, and second, it’s pretty hard to actually die.
What you need to do to fight this boss is ride the horse around, with your bow equipped. If you look hard underneath him, you will see three weird sacks at the from, middle and the back. You have to pierce these sacks with your arrows. When you hit one of them, you’ll see black blood spill out and they will shrivel up. Your goal is to do that to all three of them. The best way to do it is to aim while riding your horse under the boss, and moving in the same direction. Don’t charge your shots at all, just tap the square button like mad while aiming at the sacks and eventually one of the arrows will hit. After all three of the sacks are pierced then you get your opportunity to climb on top of the monster.
This is where things get really fun. Two of the front wings on either side of the Colossus angle down after the sacks are pierced. On each wing there are grooves that act as ledges for you to climb, but since he never stops moving it’s hard to actually get a chance to grab them. You need to get onto your horse and start riding as fast as you can. At top speed the horse goes just a bit faster than the Colossus so you can catch up. Get yourself beside one of the front wings down on the ground so that you are moving exactly parallel to it. Before you jump, speed up a little and get in front of the wing. Now everything is set and you have to aim the left analog stick toward the ring, and press the triangle button to jump while holding R1 to grab. If all goes well you’re now holding onto the wing.
It can be hard to climb up at times since the air resistance is trying to push you off the side. Just keep tapping triangle and as you go up, the Colossus should straighten out the wing so that you can run on it without holding on. Run to the edge where the wing almost meets the body and make a daring leap onto his back. There are three symbols located on this boss, one near the front, middle and back. As you run down the body a bit you’ll notice weird flaps of skin or something extending almost vertically in the air. Behind these skin flaps (which are acting as a protective shield) you will find the symbols. You need to go around them and then equip the sword to see them. They’re quite big so it’s hard to miss.
You can almost kill the boss in a single run, but not quite, at least I’ve never been able to. Two fully charged up stabs will eliminate the first symbol. At this point you don’t want to wait around at all. Run down the body further toward the second on in an equivalent spot. Stab this one twice with two charged up attacks and once again, be on your way. By the time you reach the third one you might be able to attack it, but more than likely the skin flap will begin closing over the symbol, and the boss will start to dive head first into the ground. This gargantuan Colossus is able to dive under the sand, and you aren’t, so you’ll be knocked off as he enters the ground. When he pops back out again the three sacks have been renewed. Again your goal is to pop them, and climb up. A second chance up there should be more than enough to finish off this boss.
Shadow of the Colossus Walkthrough: Fourteenth Colossus Guide
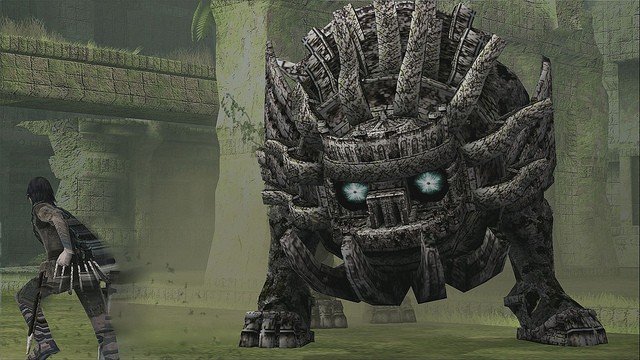
Finding the Fourteenth Colossus
This Colossus is the hardest to find out of all the ones you’ve faced so far, so make sure to listen carefully. Use the sword to get an approximation of where you are going, and then take the path that crosses the canyon just north and a bit west of the temple. When you reach the other side, let the light of the sword guide you exactly. When you reach the wall and cannot go any further, make a left and follow the wall as closely as you can going west. Before long you’ll reach one of those weird tower things, and behind it a path going up into the mountains. Take this path straight until it opens up again to a new area. It’s kind of dark and rocky. Directly west of you, you should be able to see some dead trees. Head through them going southwest for only a few seconds and then when you can, make a right and follow the path northwest.
When you come out the other side of this path, notice a couple of pillars ahead of you. Make a left at these small pillars and you should be on a path with tons of these small pillars. If you are then you’ll know you’ve gone the right way. At the end of this path make a left, and enter the cave. The cave slopes down and leads to an underground pond. You have to abandon your horse here and swim through it to the other side. There’s a little bit of a walk but soon enough you’ll pop out among some old abandoned ruins. There’s a short scene and then you have control again. Jump down to the first platform and then down to the ground. South of here is a tall vertical opening in the wall just big enough for you to pass through. At the bottom of the stairs climb up that toppled pillar and follow the path here up the small set of stairs at the end. The next Colossus is waiting for you there.
Fighting the Fourteenth Colossus
You’re certainly going to notice some similarities between this one and that other one you fought that looked exactly the same. Fortunately, despite the similar looks of the creatures, the battles are really quite different. Be very careful though, the attacks like the running bodyslam do a lot more damage with this boss than the previous one. You don’t have nearly as much leeway when trying to dodge on ground. For this reason, it’s a good thing you won’t be spending much time on the ground.
Like before you won’t see any weak spot on this creature, and since weapons don’t have any effect, you’ll need to find someother way. The solution is as follows: jump up onto the fallen pillar right beside you when the cutscene triggered at the start of battle. Basically if you face west from near where the boss first appeared and look in that direction, the fallen pillar I’m talking about is the one laying beside the small set of stairs. Jump onto this pillar and then jump northwest and grab onto the nearby ledge. From this ledge jump directly west to an even higher wall, and then make a short jump west again to the platform a few feet lower than this one. Finally you can turn and run south, to jump and grab hold of the vertical pillar from the ledge you’re on. Once you manage to climb on top of the pillar, you must then play the waiting game.
Being on top of this tall pillar makes the boss angry, and when he’s angry, he rams into things. Make sure you’re holding R1 to duck down because the Colossus is going to be ramming this pillar. If he gets bored of ramming it, a couple of arrows anywhere on his body will make him angry again. After ramming it twice, the pillar falls down. It doesn’t matter if you fall off since you can climb onto it again when it’s on the ground. From the fallen pillar you can now reach the ledge by jumping off of it to the south. Run west along this and jump to the next one, then jump up to the wall. You can jump from the wall, west down to the next ledge and onto a pillar again. I think the need to explain this process in detail has long since passed. Basically you let the pillar fall, then jump and climb to the top of the next one. Repeat this process until you are able to jump and grab that tall boxed structure at the south end.
Since you can’t get up it from the side you jumped from, you need to shimmy around to the right side and start jumping up. When you get as high as you can, move over a little bit more to the right. Almost as far as you can go, but not quite. You want to align yourself with the pillar. When you are in position, jump from the ledge in the opposite direction grab the pillar, then climb up. This is the last pillar, just sit on top of it and wait for the Colossus to knock it over. When it falls it will take out the entire wall beside you. This should look familiar as being the same place you entered this area from. On the east wall there is a section that can be sclaed upward. Climb onto the platform above and just wait there, in the middle section. Shoot arrows at the boss if he is ignoring you, but eventually he should ram the support pillars holding this platform up. This of course brings it all down on his head and finally cracks his armour, making him vulnerable on his back.
The battle isn’t over yet, but the hard part is. What you need to do now is find one of those pillars you knocked over. Climb up onto it and fire an arrow at the boss to get his attention. Duck down on the pillar using R1 and wait for him to ram it. The pillar has already fallen down so you’re not trying to make him knock it over, but you will notice that after he rams it, he is disoriented and immobile for a few seconds. This is when you strike, jump from the pillar onto his back and jam your sword into the symbol. You can keep doing it over and over until he is dead. If you get knocked off, just jump onto one of the fallen pillars again.
Shadow of the Colossus Walkthrough: Fifteenth Colossus Guide
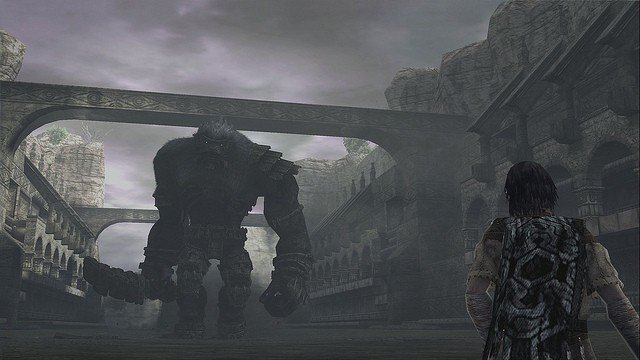
Finding the Fifteenth Colossus
There is a very deceptive light ray here. If you follow it exactly it will lead you straight into a forest and you won’t have a clue how to get out of there in the right direction. It turns out the boss is behind the forest, and the light does very little to let you know that. What you want to do is take the winding path across the canyon, the one northeast of the temple. When you get across the light will be pointing you right between the two pillars to the north, that is the absolute wrong direction entirely. You want to go west, around those two pillars and around the entire canyon. When you get past it, head north between the large bridge and the stone wall to the east. When the wall ends and you have the opportunity to go east, make sure you take it. Take a look at the light from your sword now and it will more accurately point to the ruins of some kind of coliseum. When you arrive there you’ll find entrance on the upper area of the western side.
There’s a thin opening. Past the first pillar in here is a fallen pillar which might as well have “no horses” written on it. Abandon your horse here and climb up either the left or right side. You can get around the pillar this way, and the rest of the linear path takes you into the actual coliseum. All you have to do is run to the opposite end and the next Colossus will rise up from the ground.
Fighting the Fifteenth Colossus
We’ve finally got another traditional Colossus on our hands, and it’s bigger and meaner than ever. Equipped with some kind of stone cleaver, he’s ready to smash anything in his way using either the cleaver or his enormous feet. There’s nothing climbable to be found on his lower body, so instead we’ll be looking for a way to get to the upper body instead.
It’s pretty obvious that you have to use the sides of the Colosseum to your advantage, but even knowing that it’s hard to figure out exactly how to get up there. The answer isn’t simple, but it’s as reasonable as any other. For the sake of simplicity, let’s climb up the side just to the right of where you entered the coliseum near the pillars. To the right of these pillars (when facing east) you will see a lower ledge, but one that is still to high to climb up. Notice how the tiles below this are somewhat raised off the ground, this is very important, because it will allow them to be tilted. When the tiles are tilted up, you’ll be able to jump from the higher end and grab that ledge above you. Now to tilt them.
Stand on one of the tiles below the ledge, and whistle. If that’s not good enough, fire some arrows, anything to get the Colossus’ attention. He’ll wander over toward you, look around, and then stomp down on the tile you are standing on. This will tilt it up toward the ledge. Now you can jump and grab the ledge and pull yourself up. That’s the first step out of the way. The second step is somewhat similar. What you have to do is run down this hallway here and kind of wait in the middle. Get the Colossus’ attention and make him attack with his huge cleaver. You can see that above you in this hallway are some blocks between the beams. Some of them have fallen down. Well when the Colossus hits this with his cleaver, another one will fall down on top of one that was already there. When you stand on it you will be high enough to jump at the wlal and grab hold of the lip that extends across. Shimmy along to the left, opposite the direction where you jumped up. When you reach the far left side you will be able to jump up to the next level by climbing the ledges.
Here all you have to do is run across the ceiling of the previous level, being careful not to fall down where the blocks dropped. There is a staircase at the end, go up that. Run to the very middle of the Colosseum and stand on the bridge that connects on side to the other side, but not in the middle. The Colossus is able to smash this long bridge with one attack, so if you’re standing in the middle you will be knocked down. Wait until he gets as close as possible, luring him with arrows and whistling, then make a huge leap onto his head. It’s difficult to judge distance exactly, make sure you wait until he’s as close as he can possibly get or you’ll miss. It’s extremely easy to miss here.
Now that you’re on his back you will want to make tracks for the symbol on the top of his head. This symbol can be stabbed enough so that the Colossus goes down to less than 25% of his total health, but it’s not quite enough to kill him, there’s still more. Now what you have to do is run to the back of his right shoulder and begin climbing down the right arm holding the cleaver. Around the elbow you’ll find a trigger symbol, hit it once and the Colossus will drop the cleaver out of his hand. The final symbol which kills this mammoth beast is on the palm of his hand.
All you can do at this point is drop back down to the ground. The overhead strike with the cleaver has now been replaced by a ground punch. Run around in front of the Colossus and get him to pound the ground with his right hand. When he does, run up to it and grab onto his palm hair (yes, he has palm hair). A single charged stab will end the battle.
Shadow of the Colossus Walkthrough: Sixteenth Colossus Guide
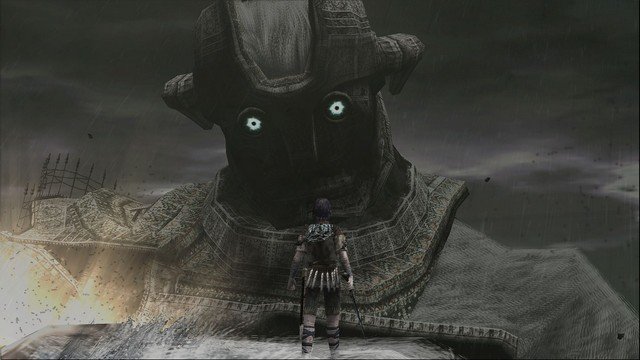
Finding the Sixteenth Colossus
This is another deceptive light beam. If you try to follow it, the beam will lead you to the wall you climbed to reach the first Colossus. It’s probably easiest if you look at your map. See just below the temple in sector F5? There is a mountain range that goes east and west, but on the east side of sector F5 there is a path between the mountains leadiing southeast. That’s the path you want to take. In map terms this means going all the way south until you hit a wall, then turning left and following the wall east until you find the opening. You’ve been down this path once before for a previous Colossus, but you went left when the path forks. This time you are going to turn right. It will open up to a lush green field. Use your sword to identify your destination, it is an enormous double door between two stone pillars that can be seen from miles away. When you arrive there you’ll see a beam of light coming through the hole. Stand in the beam and lift your sword. Aim your beam back toward the source of the light to unlock the doors.
Ride your horse through this next area and up the stairs at the end. You’ll reach a point where you have to jump with the horse onto the next platform, a scene will automatically take over from that point. When you have control again, grab the ledge on the wall ahead of you and begin climbing up. Make a right when you reach the top and jump up the blocks and stones to find a wall covered in vines. Scale this wall to the highest point and then climb across to the left. There’s a few more rocks to climb up here before you reach a tunnel. The weather starts getting bad here at the top. When it seems like you’ve reached a dead end, look to your left or right and notice the pillars have grooves in them. You can climb these pillars to the top. Jump off the pillar at the top to trigger a scene and begin the final battle.
Fighting the Sixteenth Colossus
Before you can even reach this enormous Colossus you must first pass through the field ahead of him. The problem with passing through this field is that the Colossus is able to fire a powerful energy blast which cannot be dodged by any traditional means. For this reason you will have to take cover each time a blast is fired rather than trying to dodge it. There is always cover to be taken if you know where to go, just follow these directions and you’ll be able to make it through safely.
Run up the stairs ahead of you at the start and roll behind the broken pillar on the right when you reach the top to avoid the attack. Further to the right of this pillar there is a hole in the ground that drops you into a tunnel. Follow the tunnel to the other end. There you will find some blocks, jump on top of them. Now face the boss, jump, and grab the ledge but don’t climb up. You can see ahead of you there is a wall with a horizontal viewing window that can be used for protection. What you need to do is climb up and roll behind the wall quickly. Next look west and you’ll see a whole line of these walls. You need to roll from protective wall to protective wall to reach the west side without being hit (admittedly rolling isn’t really necessary.) At the west end you’ll find another hole you can drop down. Proceed through this tunnel. At the other end the tunnel comes out on a walkway along the side of the wall, you are relatively protected here. Follow this walkway until it comes to an end. At that point you have to jump and grab the ledge, then go hand over hand over to the right, and jump to the next platform. Now you have to be careful here. The instant you go around the corner the boss is going to fire, you have to move quickly. Make an immediate left and run east into the tunnel ahead of you. When you pop out you’ll be able to climb the pile of stone ahead of you, and hide behind another wall. There are a couple more to run past to the west (for these ones you really should roll, since they’re further apart.) The last tunnel will take you directly below the Colossus and trigger a short cutscene.
You need to start climbing via the wall ahead of you. To be honest this climb is pretty self explanatory, none of the ledges are hidden but you can follow along anyway (there are more than a few different ways to get up.) Turn right at the top and jump to the next platform, right beside you is another ledge to climb. Turn right on this level and jump to the ledge across from you. On this level when you jump to the right you’ll find a series of seven or eight ledges to climb that take you up a good three more levels. At the top shimmy left and get on the nearest platform. You can jump and reach another couple ledges from here, and keep going straight up a few more. If you haven’t (more than likely) lost track of these directions by now, you’ve only got one more set of ledges on your left before you reach the main destination.
However you got up to this point you will either be on the front of back side of the Colossus. You need to be on the back so if you’re on the front, simply run around to the other side. Notice a large trigger symbol right there on the hair on his back. Grab hold of it and stab. The Colossus will bring one of its hands down to examine the wound, that’s your chance to jump from the back, onto the palm of the hand.
Hang onto the palm, don’t try to climb around. The boss will soon stretch out his arm with the palm facing up. At this point you need to run quickly up his wrist as high as you can before he lowers his arm again. Climb up toward the fur on his arm before that glowing armband (incidentally, those glowing armbands will electrocute you if you touch them.) Below the armband is another trigger symbol. Stab it with all your might and he will bring his other hand over to cover the wound. Jump from this arm to the palm of the right hand this time.
Now you’ll be taken to the other side. There’s no symbol here but what you have to do is stab him anywhere on this hand, and he will lift it up to examine it flat. He holds it up for a very long time so this is the best chance you have to regain your strength. Once you’ve done so you can use the sword to identify a weak spot on his left shoulder. Equip the bow and aim for that spot and fire. He’ll lift the hand you are standing on to cover that wound. This is your chance to jump off onto the shoulder. Finally from here you can jump onto his neck, and then onto the top of his head. The Colossus will flail around wildly and you will have very few opportunities to attack, but they do present themselves. This is the only true symbol on his entire body, so good luck with finishing him off. When you eliminate this final symbol, the battle ends and the ending triggers.
You have now officially completed Shadow of the Colossus. Well done. Note that during the ending sequence, you will have the opportunity to control the game for a moment, but it won’t really make any difference in particular as far as I know. Enjoy the ending sequence, it’s actually quite good.
Legal and Copyright
This guide is copyright (c) 2005 Alex Eagleson, the author.
This walkthrough was written solely to be hosted at www.gamefaqs.com. It can also be found at www.ign.com, www.neoseeker.com and many other websites, all who sent an email asking permission to put them guide up on their site. I do by the way, encourage people to send email, feedback is always appreciated in any form, it’s always nice to know you’ve helped someone.
For a list of all my work, please visit the following URL: http://www.gamefaqs.com/features/recognition/45802.html
Credits and Thanks
Thanks to Jeff “CJayC” Veasey for hosting the guide at www.gamefaqs.com
Thanks to Sean, Mark and Jeremy back at University of Guelph.
Thank you very much finally, to anyone and everyone reading this walkthrough.
